Rust Bluing - DIY Steam Pipe apparatus / Damp Cabinet
- Gadge
- .22 WMR
- Posts: 109
- Joined: Mon Jun 11, 2007 1:24 pm
- Favourite Cartridge: .270Win
- Location: Gippsland, VIC
Rust Bluing - DIY Steam Pipe apparatus / Damp Cabinet
I've gleaned ideas for this from a few different references/websites, and the final design just suddenly 'gelled' yesterday.
I'm starting off with this: This is just an old Sunbeam leccy frying pan, with stuffed anti-stick coating - knew I'd find a use for it some day!
The deep base and flat-top lid make it perfect for the project.
A trip to Bunnings and $18.45 later, I came home with these two components;
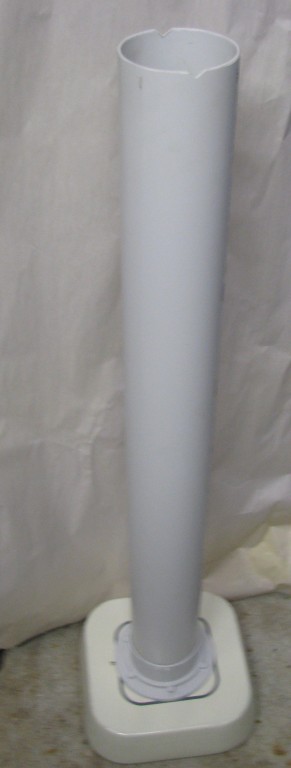
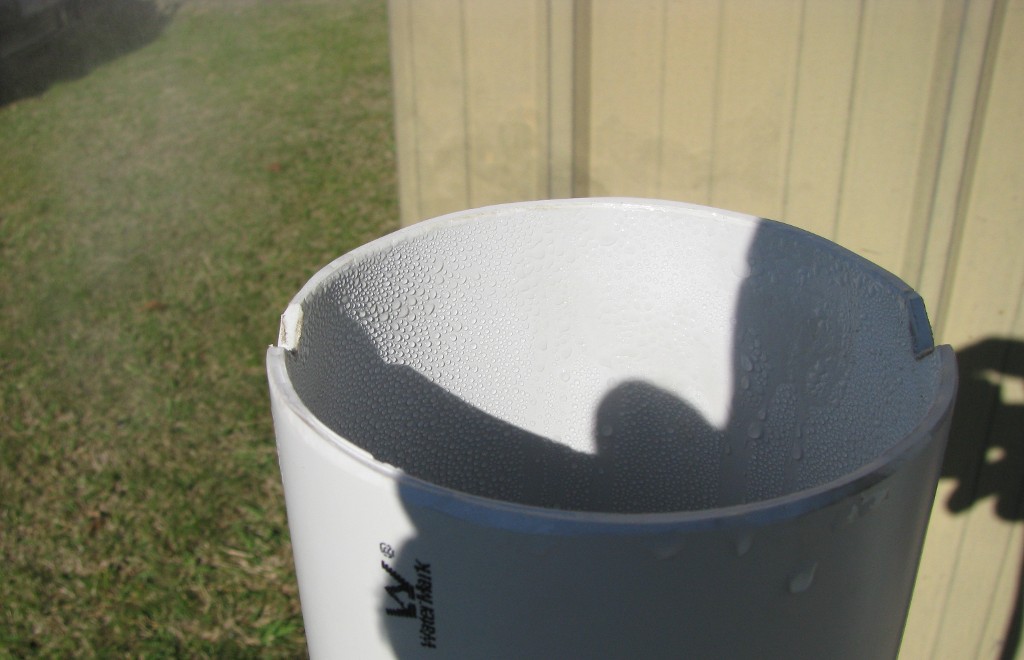
A 1-metre length of 100mm PVC DWV pipe, and a PVC fitting.
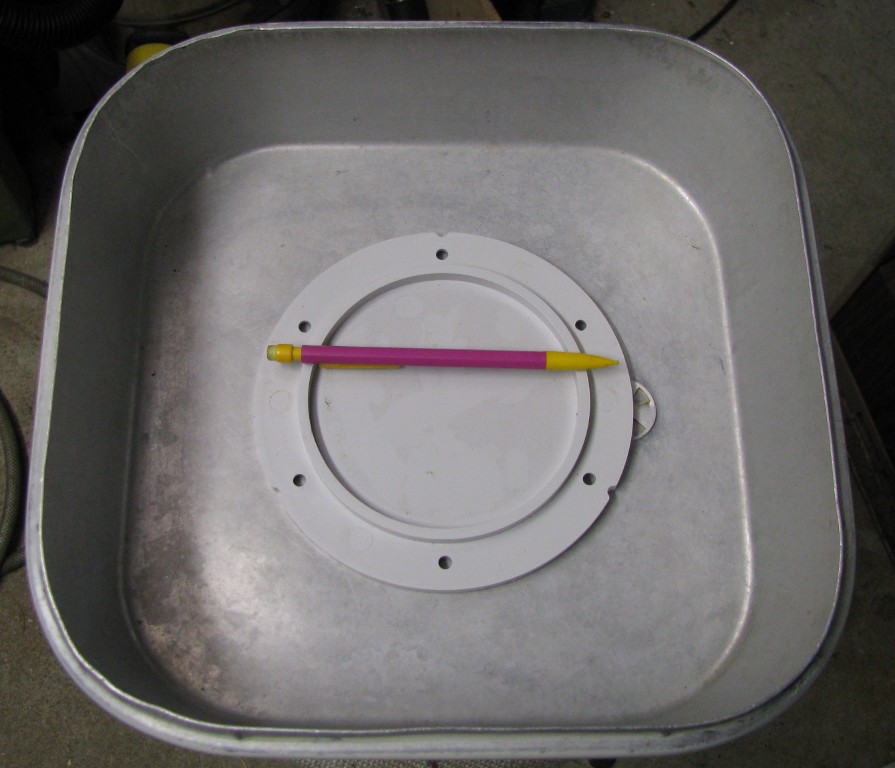
This fitting is called a '100mm DWV PVC Bolted Trap'; they're not something you'll find in all hardware shops, but Bunnings have them.
Edit: to localise images in this post.
Last edited by Gadge on Wed May 17, 2017 7:18 pm, edited 1 time in total.
- Gadge
- .22 WMR
- Posts: 109
- Joined: Mon Jun 11, 2007 1:24 pm
- Favourite Cartridge: .270Win
- Location: Gippsland, VIC
Re: Rust Bluing - DIY Steam Pipe apparatus / Damp Cabinet
[size=14pt]
Fitting up the frying pan lid[/size]
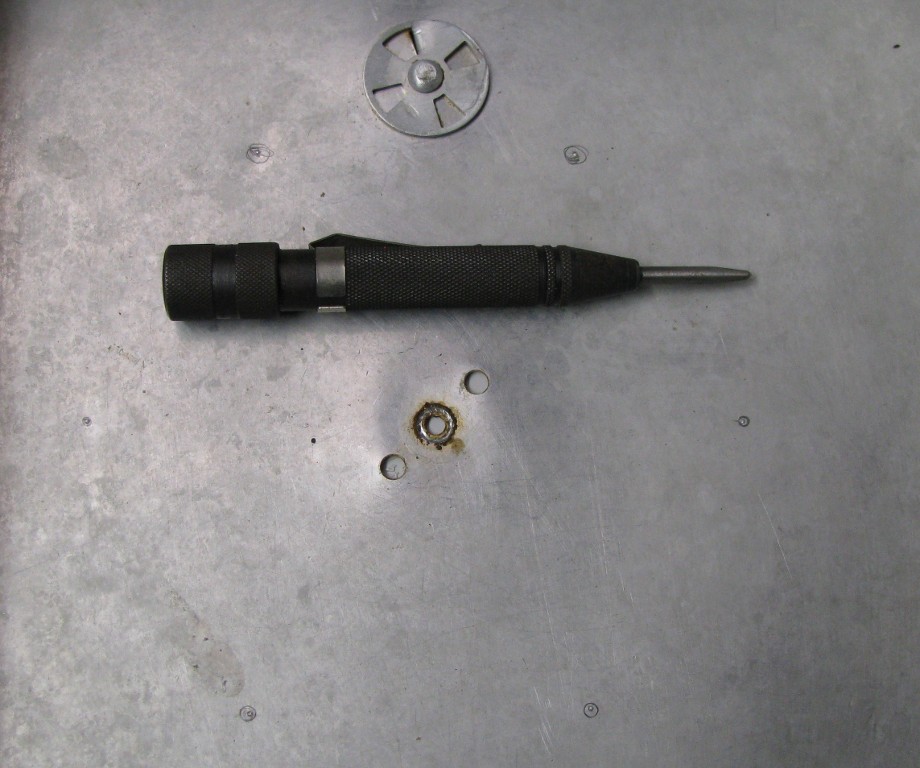
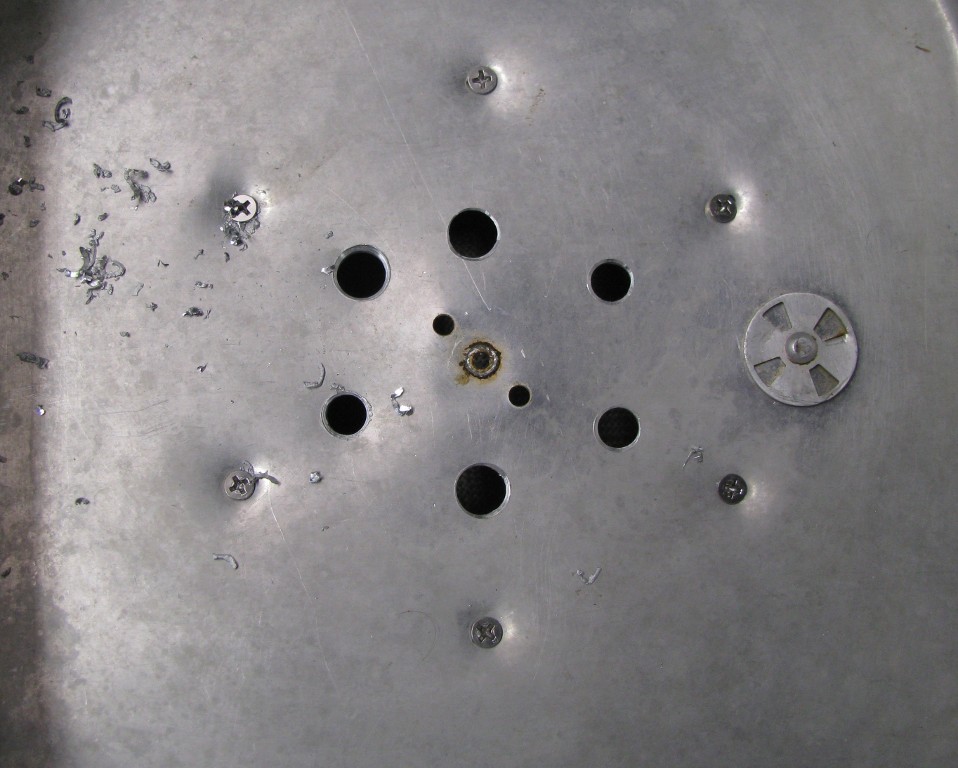
After removing the knob from the frying pan lid, the bolted trap lid makes a good template for marking out the mounting screw holes;
Holes marked and centre-punched;
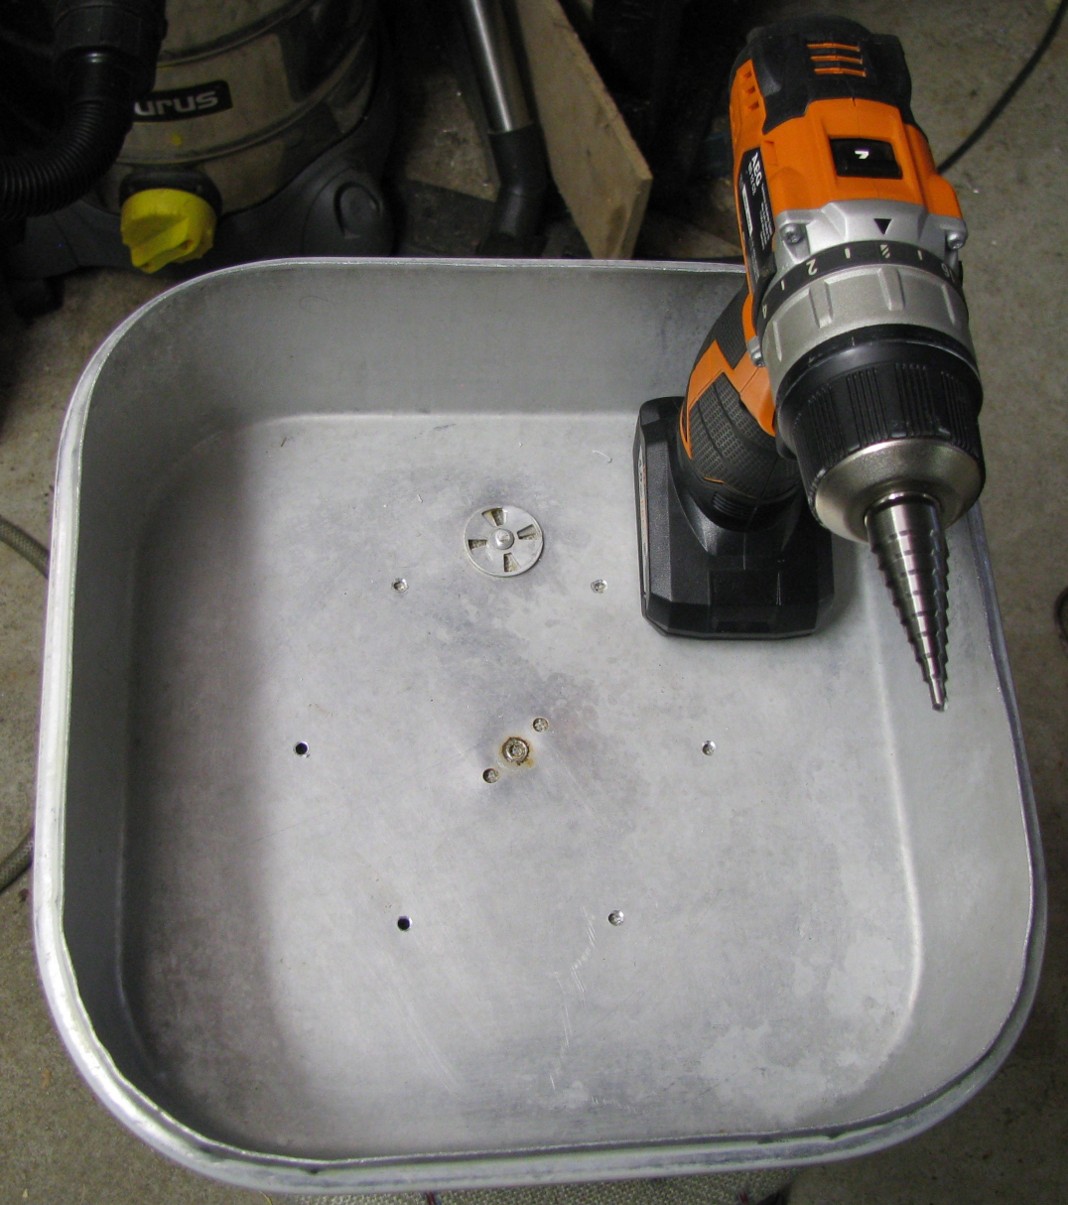
Holes drilled, using step bit shown;
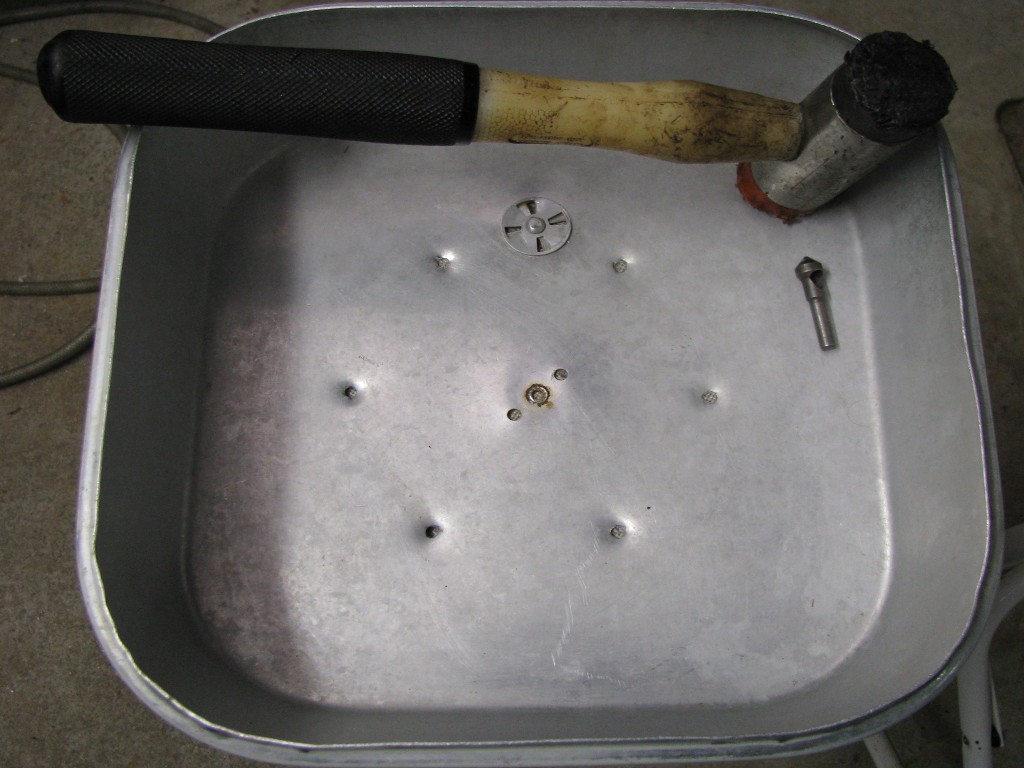
Holes dimpled for the stainless countersunk screws that come with the trap fitting, using a cross-hole countersink as a punch;
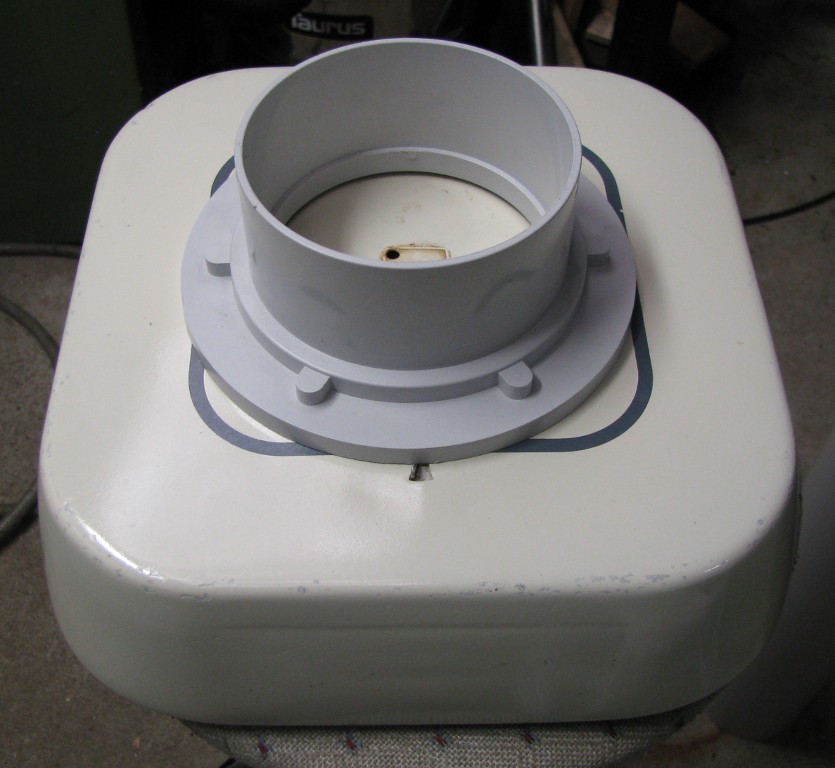
Body of trap fitting, mounted with the screws. As usual, get them all started, before final tightening any of them;
I don't recommend using silicone sealant here, and haven't bothered with a gasket. The steam leakage around the edges of the frying pan will be much greater than around the fitting anyway...
And the end of this stage - drilling/deburring some decent sized steam vents, again using the step drill bit;
More to come...
- Gadge
- .22 WMR
- Posts: 109
- Joined: Mon Jun 11, 2007 1:24 pm
- Favourite Cartridge: .270Win
- Location: Gippsland, VIC
Re: Rust Bluing - DIY Steam Pipe apparatus / Damp Cabinet
Build Episode 2
[size=14pt]The Steam Pipe[/size]
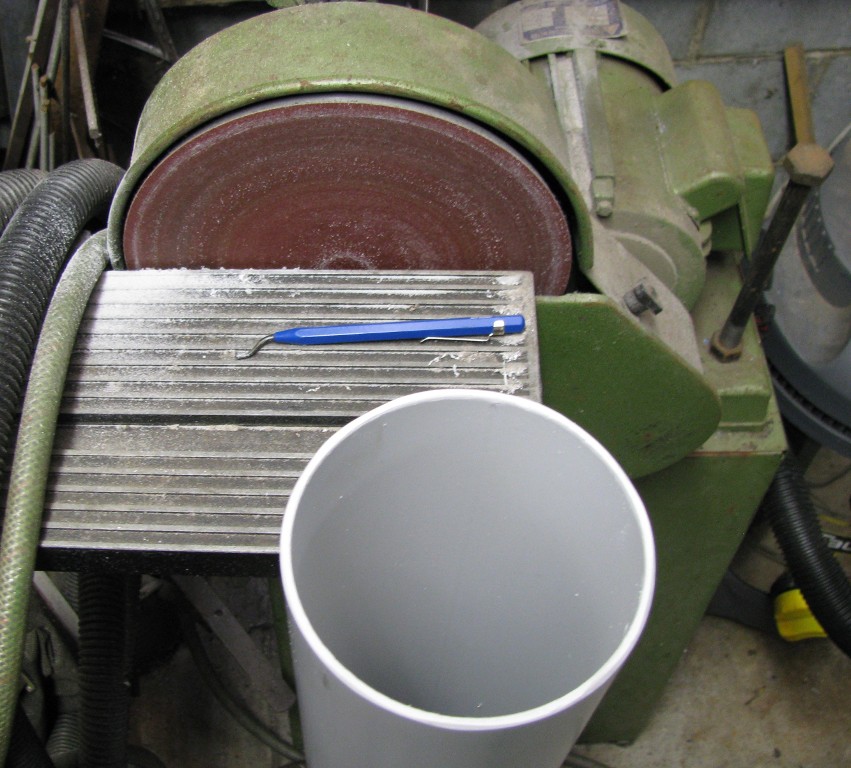
Deburring of the PVC pipe ends; inside with the blue Shaviv deburring tool, outside with the disc sander;
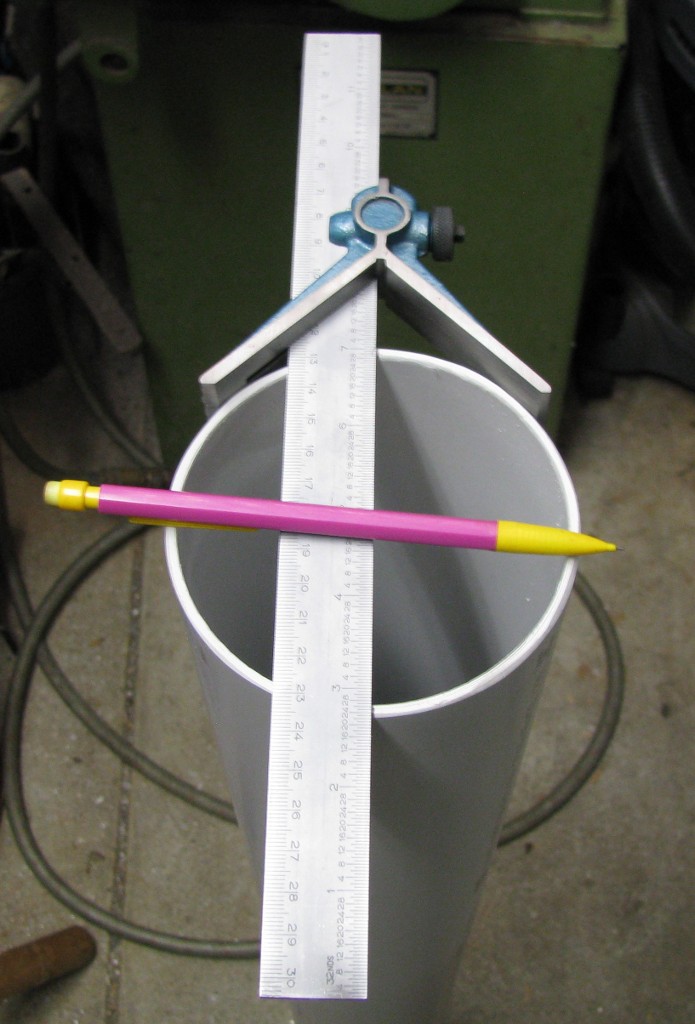
Marking the centrelines for V-grooves in the top of the pipe, to locate the cross-bar, so as to suspend barreled actions/parts from it;
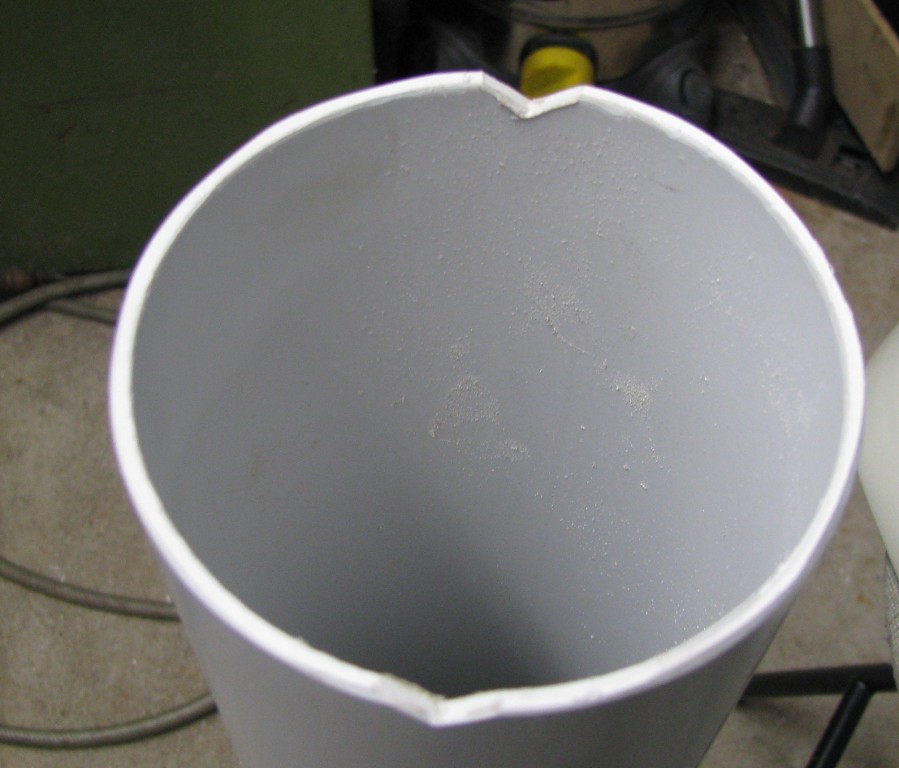
The V-grooves, cut with a 'cant saw' file [if anyone doesn't know what this is, I can post a pic];
The finished lid/pipe assembly - don't see any need to glue this up, at this time;
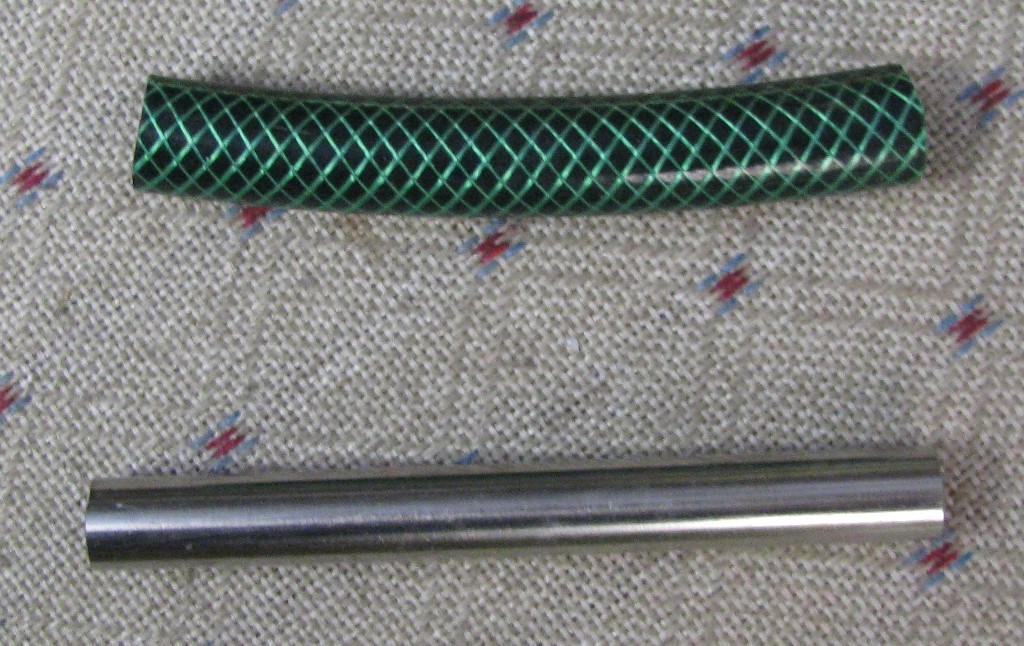
The crossbar components; wood dowel would also work, but as I had some 1/2" OD 316 stainless milking machine tubing...
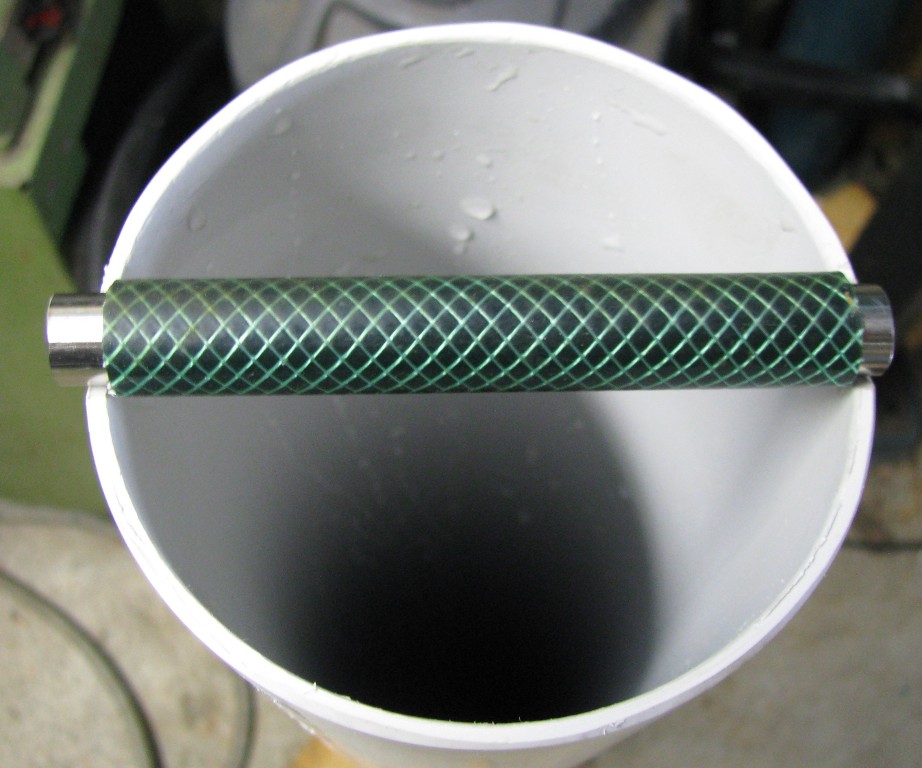
The crossbar in place. The hose is just a piece of 1/2" garden hose; it prevents the crossbar sliding sideways under load, and dropping the suspended part/s down the pipe;
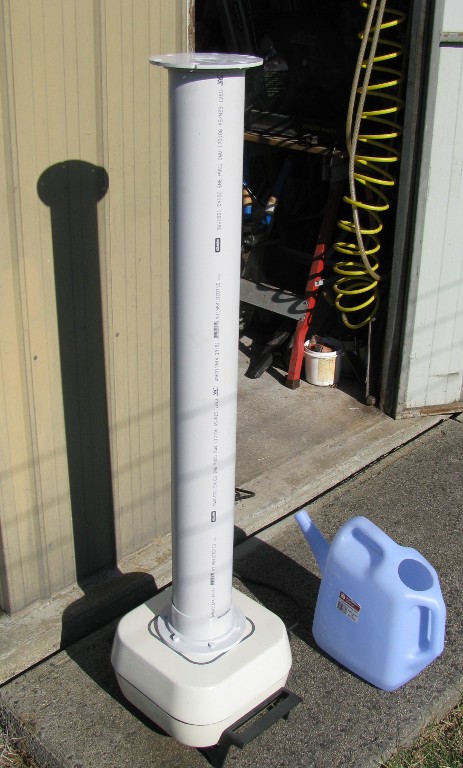
The 'apparatus' set up, ready for its first live steam;
We have steam!
This job took about an hour, start to finish.
The advantage of using a leccy frypan, is that it is closed-loop controlled by a thermostat [not an open-loop simmerstat/energy regulator], and it's very easy to control the steam production rate.
While steaming parts, it's usual to cover the top of the pipe with a towel, or aluminium foil.
I may cut the V-grooves deeper at some time, to allow the trap lid to be used as a loose lid, if I feel like it.
This setup also doubles as a 'damp cabinet' for the rusting steps in the rust blue process; just fill the pan up with cold water!
- Gadge
- .22 WMR
- Posts: 109
- Joined: Mon Jun 11, 2007 1:24 pm
- Favourite Cartridge: .270Win
- Location: Gippsland, VIC
Re: Rust Bluing - DIY Steam Pipe apparatus / Damp Cabinet
Folks, could you let me know if you can view the images OK? They're hosted on an external server.
And I have a how-to doco available, on making up Aqua Regia [Nitric/Hydrochloric acids] based rusting solutions, that I've written.
It's based on using a powder scale to accurately dispense small volumes [for 100 or 200 mL final volume of solution] of acids accurately.
So it doesn't involve sourcing/using volumetric glassware, except to measure the final volume!
It's available only by direct e-mail from me, and I do request that it is not posted up on any website. For those who'd like a PDF copy, PM me your e-mail addy.
- Camel
- Ultimate AusVarminter
- Posts: 12084
- Joined: Sat May 28, 2011 8:51 pm
- Favourite Cartridge: 20-222 6x47 rem, 250
- Location: Northern Riverina NSW
Re: Rust Bluing - DIY Steam Pipe apparatus / Damp Cabinet
Good build thread and some very nice work done there.
- mick_762
- 50 BMG
- Posts: 4156
- Joined: Sun Mar 04, 2012 1:46 pm
- Favourite Cartridge: 308 Norma
- Location: Wodonga Vic
Re: Rust Bluing - DIY Steam Pipe apparatus / Damp Cabinet
Bloody good build mate!!
Will be interesting to see the next steps as well laid out and explained.
- MISSED
- Moderator
- Posts: 8377
- Joined: Sat Dec 22, 2007 12:23 pm
- Favourite Cartridge: 20 PPC
- Location: YASS
Re: Rust Bluing - DIY Steam Pipe apparatus / Damp Cabinet
Great work do you have any pics of completed bluing
- Gadge
- .22 WMR
- Posts: 109
- Joined: Mon Jun 11, 2007 1:24 pm
- Favourite Cartridge: .270Win
- Location: Gippsland, VIC
Re: Rust Bluing - DIY Steam Pipe apparatus / Damp Cabinet
Patience, brasshopper!
I have some development work on a Zinc Chloride/Hydrochloric Acid rusting solution planned, as Nitric Acid can be a bit hard to get hold of.
I'll be using a few old hand tools as test pieces, and they're currently in the water/molasses de-rusting bath, which takes time to do its work.
Then I have to re-finish them, which is going to involve fabbing a pedestal, for a wet stone grinder/polisher I picked up for cheap recently.
Re: Rust Bluing - DIY Steam Pipe apparatus / Damp Cabinet
How well does the steam bath convert the brown to black?
I'm curious, as I normally boil the barrel etc in a long tank with distilled water but it can be a pain to have enough distilled water on hand. I've found the depth of brown to black conversion varies with water quality sometimes.
I'm also careful to not create a rusting area that it too humid or you get condensation on the parts which leads to pitting. Also, if it's too damp the rusting can be too aggressive and you get pitting before you get a chance to get back to the next boil step. When I'm doing rusting cycles I have to work it around work usually, so it ends up being 12hrs or longer between boil/rust cycles.
- Gadge
- .22 WMR
- Posts: 109
- Joined: Mon Jun 11, 2007 1:24 pm
- Favourite Cartridge: .270Win
- Location: Gippsland, VIC
Re: Rust Bluing - DIY Steam Pipe apparatus / Damp Cabinet
Very well indeed. The old time military arsenals and rifle manufacturers used the steam method, to speed up the process quite a bit.
Just ran a couple of old tools, with flash surface rusting after coming out of the de-rusting bath, through a steam cycle of ~20mins. Then sat them in the sun to dry, and brush carded them [with a hand carding brush I got from Brownell's].
They'll need a couple more cycles, then I'll coat them with Boiled Linseed Oil for a permanent finish, I reckon.
Yes, that it does. Every serious reference I have on the subject, emphasises the use of distilled water only for boiling. Or in a rural area, filtered rainwater at least.I'm curious, as I normally boil the barrel etc in a long tank with distilled water but it can be a pain to have enough distilled water on hand. I've found the depth of brown to black conversion varies with water quality sometimes.
I've always used distilled water for boiling, but then I do have a lab-type electric water still to make it. An advantage of steam is that almost any quality of water, apart from those with organics contamination, can be used.
Yep, you need to be careful to keep conditions in the damp cabinet out of the 'condensing humidity' [>100% RH] region.I'm also careful to not create a rusting area that it too humid or you get condensation on the parts which leads to pitting. Also, if it's too damp the rusting can be too aggressive and you get pitting before you get a chance to get back to the next boil step. When I'm doing rusting cycles I have to work it around work usually, so it ends up being 12hrs or longer between boil/rust cycles.
The usual cause for the cabinet getting into this region, is a drop in ambient temperature.
This chart is the one engineers use to work out these issues; http://www.hvaceducationaustralia.com/R ... _chart.pdf
There are small sealed 240V 'cartridge heaters' that can be used to keep the cabinet warm, and out of the 'condensing' region of that chart.
This webpage has useful info on rusting and steaming times; http://www.rustblue.com/about/instructions/
- MISSED
- Moderator
- Posts: 8377
- Joined: Sat Dec 22, 2007 12:23 pm
- Favourite Cartridge: 20 PPC
- Location: YASS
Re: Rust Bluing - DIY Steam Pipe apparatus / Damp Cabinet
Any pics yet ?
Camel you know I cannot reed very well so pics meen a thousand words
- lee_enfield223
- .17 HMR
- Posts: 240
- Joined: Sun Nov 06, 2016 8:13 pm
- Favourite Cartridge: 223rem
- Location: sydney
Re: Rust Bluing - DIY Steam Pipe apparatus / Damp Cabinet
I use neiders rust blue and went away from using a plastic tube for steaming as it melted, so I folded up a stainless steel box and it works perfect, I also use a wallpaper remover boiler/steamer
- Gadge
- .22 WMR
- Posts: 109
- Joined: Mon Jun 11, 2007 1:24 pm
- Favourite Cartridge: .270Win
- Location: Gippsland, VIC
Re: Rust Bluing - DIY Steam Pipe apparatus / Damp Cabinet
Righto, a few pics;
Before After 2 steam/card cycles
An easy to make cap for the pipe - cut down 2L milk bottle!
Before After 2 steam/card cycles
An easy to make cap for the pipe - cut down 2L milk bottle!