DIY - New Build Project
- Seddo
- .338 Lapua Magnum
- Posts: 2054
- Joined: Sat Jan 03, 2009 9:17 am
- Favourite Cartridge: Creedmoor
- Location: Vic
Re: DIY - New Build Project
Looks sensational, you would have to be happy with how it's turned out.
-
b t
- New Member
- Posts: 71
- Joined: Tue Oct 21, 2014 7:23 am
- Favourite Cartridge: .223
- Location: Yarra Valley
- Contact:
Re: DIY - New Build Project
That looks like a fantastic stock and kudos to you for the original works and design.
I have one question though .
the photographs show the front pod to be offset from the stock what would be the reason for that ?
regards
bt
I have one question though .
the photographs show the front pod to be offset from the stock what would be the reason for that ?
regards
bt
Re: DIY - New Build Project
Hi Seddo
Yeah very happy with the way it has turned out. Still got a couple of cosmetic things to do to remove a couple of the agricultural aspects of the pods but just trying to get it going by the weekend in the first instance

Yeah very happy with the way it has turned out. Still got a couple of cosmetic things to do to remove a couple of the agricultural aspects of the pods but just trying to get it going by the weekend in the first instance
Re: DIY - New Build Project
Hi BT
The front pod is offset and the thought behind that is to offset some of the torque of the rifle during firing. It is amazing how much a rifle will torque when shot if you video it then watch it back on the computer.
The front pod is offset and the thought behind that is to offset some of the torque of the rifle during firing. It is amazing how much a rifle will torque when shot if you video it then watch it back on the computer.
Re: DIY - New Build Project
Ok today was the day to glue the action in the stock and get this baby ready for the weekend test drive 

First up was to prepare the stock and make sure that area under that action was nice clean and ready to glue to as we don't want this coming undone

So I marked where the action would go to so I knew how far to prepare the stock.
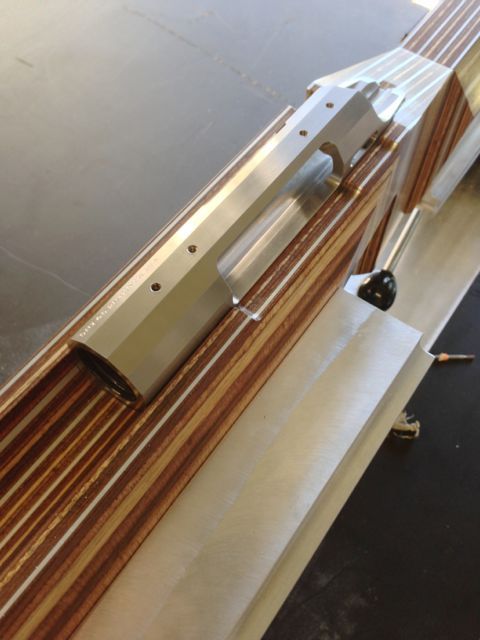
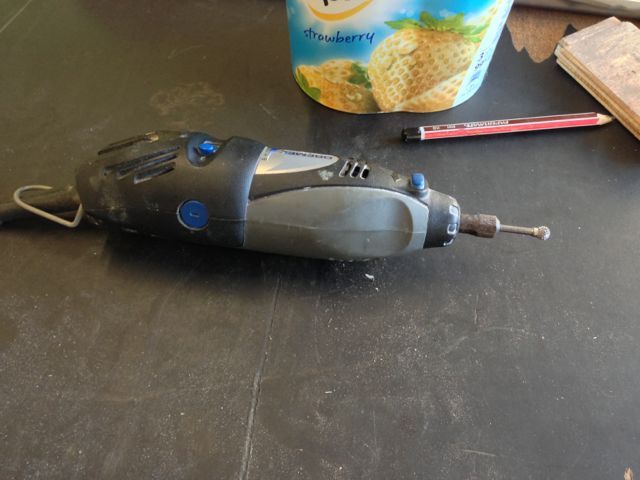
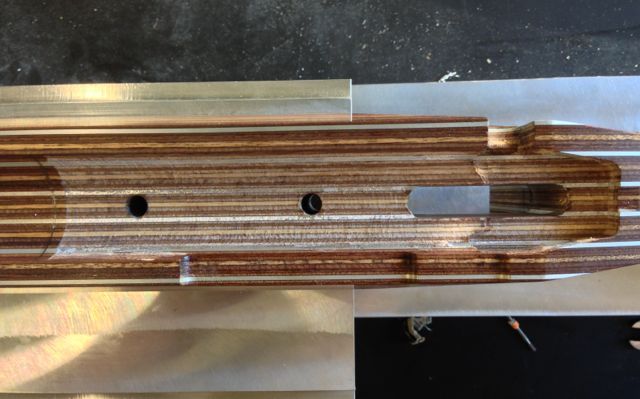
Then it was a matter of hitting the stock with the dremel with a round bur and roughing it up some. You will notice that I did not rough right up to the line marking the action face as I was not going to glue that far forward as I do not want any glue protruding in front of the action to interfere should I want to put a stretcher tube on in the future.
First up was to prepare the stock and make sure that area under that action was nice clean and ready to glue to as we don't want this coming undone
So I marked where the action would go to so I knew how far to prepare the stock.

Then it was a matter of hitting the stock with the dremel with a round bur and roughing it up some. You will notice that I did not rough right up to the line marking the action face as I was not going to glue that far forward as I do not want any glue protruding in front of the action to interfere should I want to put a stretcher tube on in the future.


Re: DIY - New Build Project
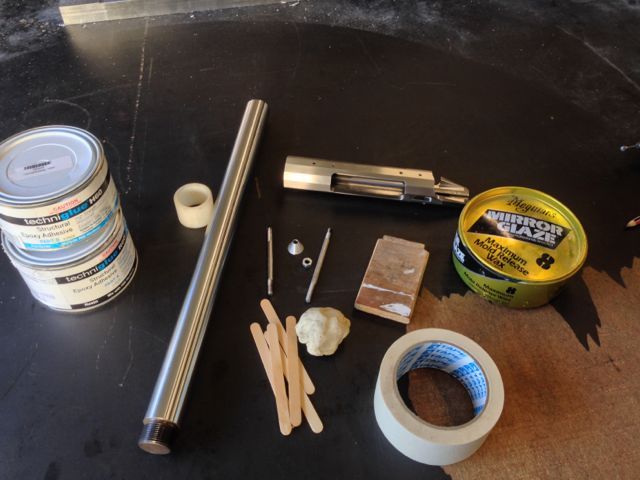
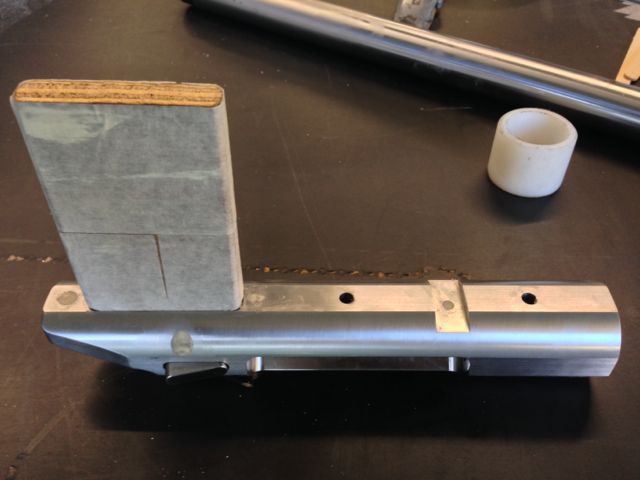
After preparing the stock, it was a matter of preparing the action. The following photo shows the gear I used so I will try and explain what some it is and used for in the whole process.
- There is the action of course and the glue........ added that for Camel

- A stub shaft that will screw in the action just like a barrel that can have a spacer or a number of spacers placed on it to align the action with barrel channel and the white ring is the spacer to be used on this job
- The block of wood is used to fit into the action where the trigger goes to prevent glue from getting into the trigger area as it is fitted after the job is finished
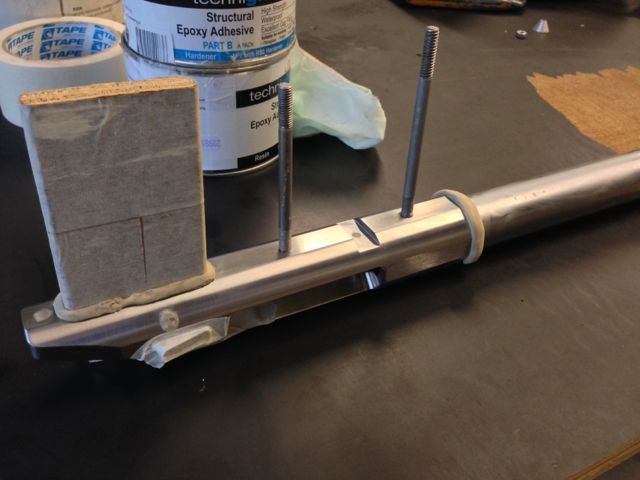
- A couple of bolts that are used to place in the action where the action screws will go
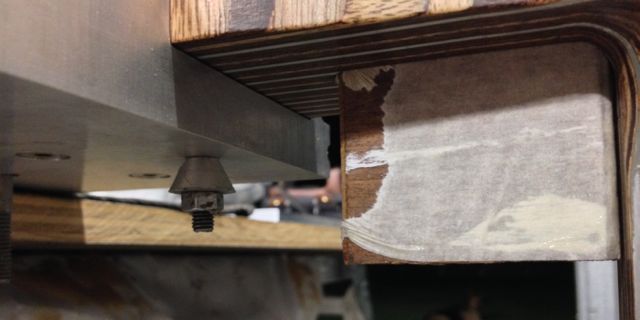
- A small cone washer I made and nut to screw on one of the bolts and align the screw with the hole in the stock and make sure all is straight while glueing in place
- Plasticine to blank any holes in the action or prevent glue from getting where you don't want it
- Release wax to put on anything you do not want stuck in place at the end of the job
- And the good old masking tape to put on the stock for when all the glue comes out
- There is the action of course and the glue........ added that for Camel
- A stub shaft that will screw in the action just like a barrel that can have a spacer or a number of spacers placed on it to align the action with barrel channel and the white ring is the spacer to be used on this job
- The block of wood is used to fit into the action where the trigger goes to prevent glue from getting into the trigger area as it is fitted after the job is finished
- A couple of bolts that are used to place in the action where the action screws will go
- A small cone washer I made and nut to screw on one of the bolts and align the screw with the hole in the stock and make sure all is straight while glueing in place
- Plasticine to blank any holes in the action or prevent glue from getting where you don't want it
- Release wax to put on anything you do not want stuck in place at the end of the job
- And the good old masking tape to put on the stock for when all the glue comes out

Re: DIY - New Build Project
Ok so the next steps in preparing the action with all those bits is:
- Plug all the unused screw holes and cover the grub screw for the bolt release to prevent glue from getting in those areas
- Wrap a single layer of tape around the timber trigger slot plug thingy so if glue does get in there I have a shear surface that I can get to let go
- Place masking tape over the bolt release to prevent any glue from running in there when it oozes out as the action is placed into the stock
- Place the timber into the trigger area of the action and insert the bolts once they all have a layer of release agent applied as these need to be able to come out
- I put a small ring of plasticine around the trigger slot timber to assist with preventing glue from getting into the slot and a ring around the shaft at the action front to act as a dam to prevent glue from pushing into the barrel channel
In the pictures you can also see the action is very 'dirty' with residue from the plasticine so this all needs to be removed to make the action completely oil / grime free to ensure a good glue bond so the action is cleaned down with acetone once all plasticine is in place and there is no requirement to touch the action surface again.


Re: DIY - New Build Project
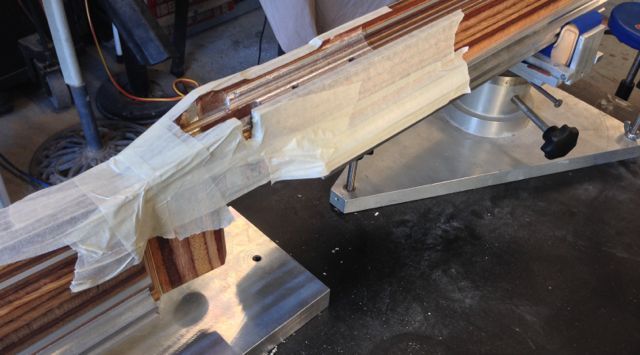
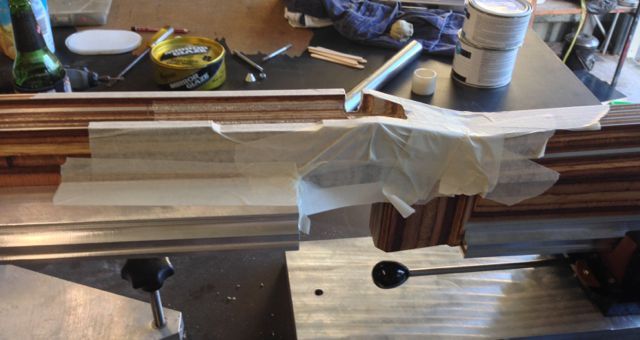
Next up is to tape up the stock and cover it to keep as much glue off it as possible when it runs out over the sides as the action is placed into the stock. The taping does not need to be perfectly aligned with the edge of the barrel channel or around the action as this is there only to catch the bulk surplus. As long as it is within a mm or two that will be perfectly fine as the tape will be removed pretty soon after the action is in and any residue cleaned off the stock with acetone.


Re: DIY - New Build Project
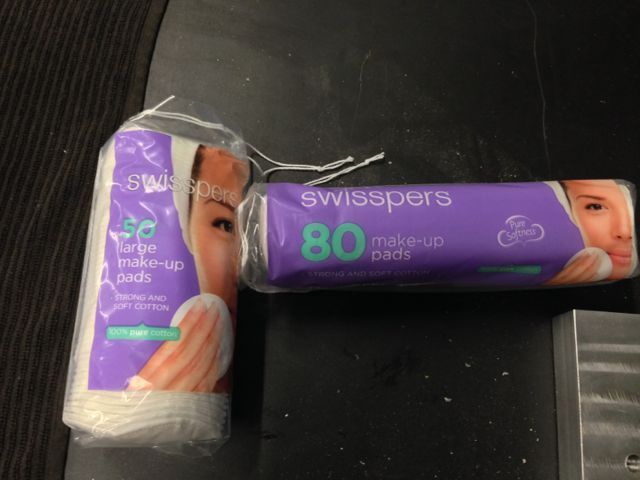
Ok so everything is ready to go except I forgot to mention what I use with the acetone to remove the excess glue. I steal these from the wife's makeup bag when she is not looking as they are perfect for using with the acetone when cleaning down the stock of any excess glue............. Camel you should not have to steal them as you probably have your own 

They are good as they do not leave any lint or fibres like cloth or cotton wools when the epoxy gets real sticky as it tacks off.
They are good as they do not leave any lint or fibres like cloth or cotton wools when the epoxy gets real sticky as it tacks off.

Re: DIY - New Build Project
Ok so I made another video of the actual glue in which should show you how hard it isn't to do if you take the time to prepare.
Sorry for the bits where the camera lost focus with the autofocus when I walked in front of it

In the video you can see I put a layer of glue on the stock and then the same on the action. This is to ensure that there is a full contact of glue and no air pockets.
uHSApwcByZw&feature=youtu.be
Sorry for the bits where the camera lost focus with the autofocus when I walked in front of it
In the video you can see I put a layer of glue on the stock and then the same on the action. This is to ensure that there is a full contact of glue and no air pockets.
uHSApwcByZw&feature=youtu.be
Re: DIY - New Build Project
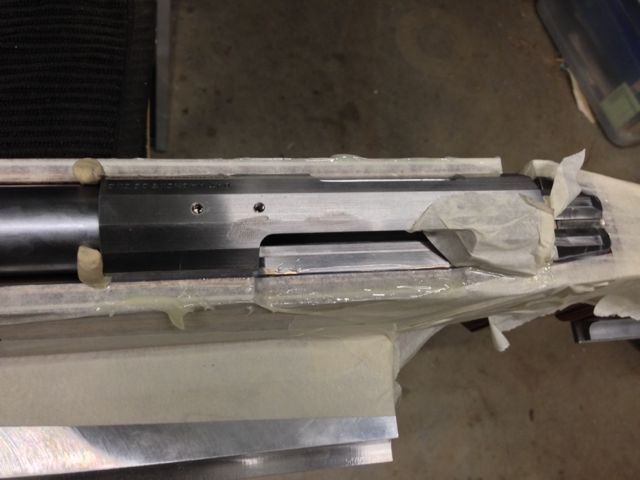
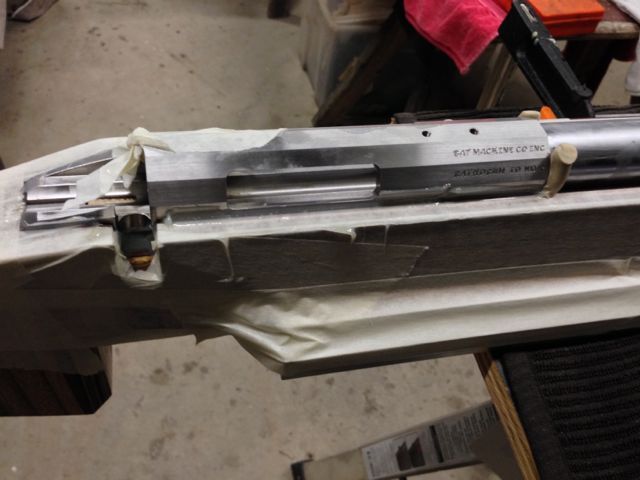
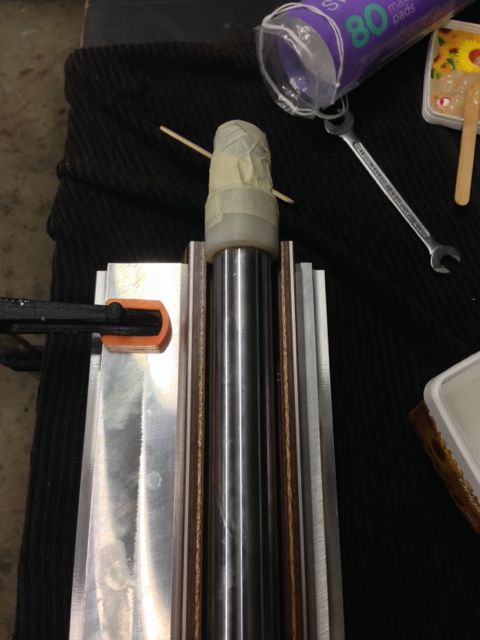
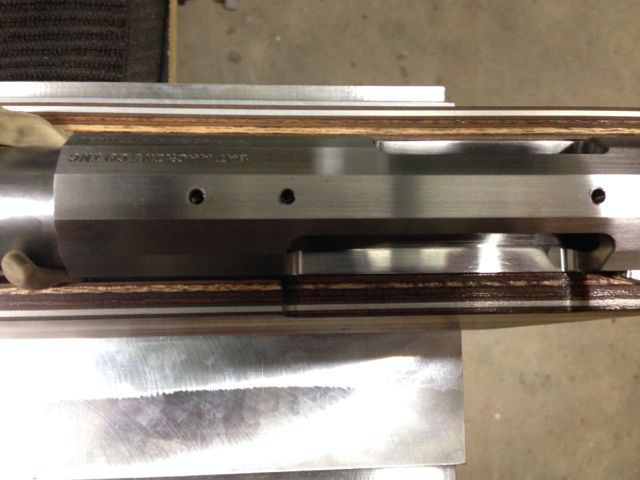
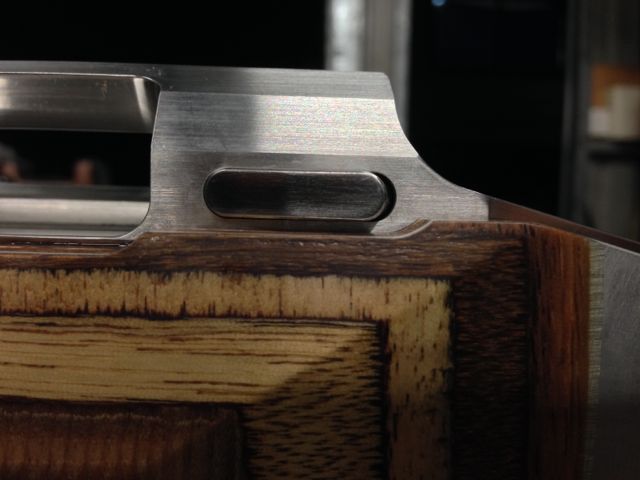
A few photos of the different bits in use during the glue up.


Re: DIY - New Build Project
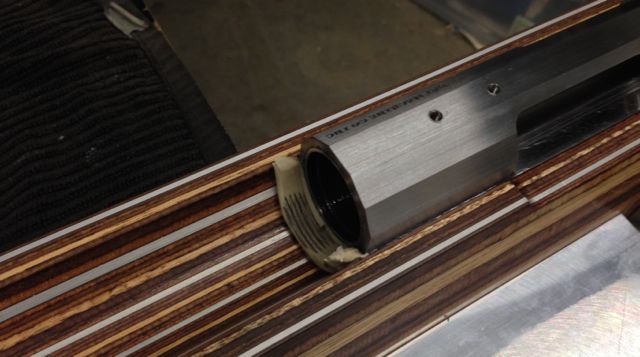
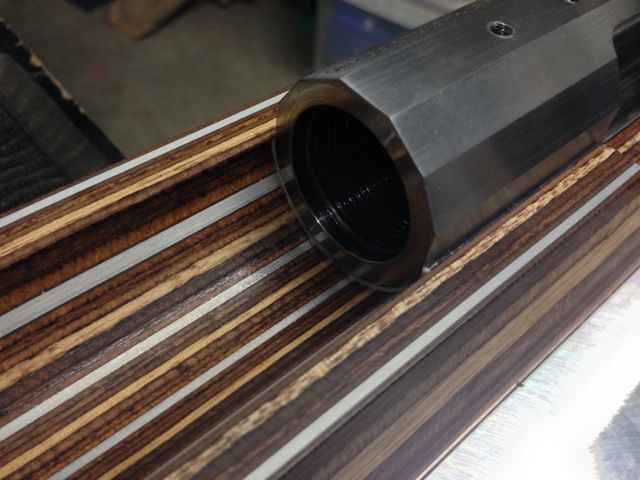
And the last lot of photos are of the stub shaft removed after the glue had gone off and was no longer required. First one with the plasticine in place and the second one with it cleaned off. I will wait till tomorrow until the glue is fully hardened then will clean the last of the plasticine off and should be all complete.


- MISSED
- Moderator
- Posts: 8377
- Joined: Sat Dec 22, 2007 12:23 pm
- Favourite Cartridge: 20 PPC
- Location: YASS
Re: DIY - New Build Project
Fantastic Al what a great thread I would like to have a look at this rifle in real life.
I hope you enjoy shooting it as much as I have enjoyed watching you build it.
I hope you enjoy shooting it as much as I have enjoyed watching you build it.
- Seddo
- .338 Lapua Magnum
- Posts: 2054
- Joined: Sat Jan 03, 2009 9:17 am
- Favourite Cartridge: Creedmoor
- Location: Vic
Re: DIY - New Build Project
Nice work!
Have you kept a lot of the time you have spent on it? It would be interesting to know.
Have you kept a lot of the time you have spent on it? It would be interesting to know.
Re: DIY - New Build Project
Definitely keen to get out and shoot it to see if all the effort has payed offMISSED wrote:Fantastic Al what a great thread I would like to have a look at this rifle in real life.
I hope you enjoy shooting it as much as I have enjoyed watching you build it.
Also, for a bit over a 4hr drive you could come up to Narromine at the end of June for the SCC and see this one and all the other BR guns that the LR lads will have there shooting.
There are quite a few......... if not most of the shooters on this forum
dg manages the shoot and I saw a post recently where he was looking to provide more free parking and additional grandstand seating for spectators........ also the grandstand seats come with free entry into the paddock (think pit pass) so you can get up close to all the guns and talk to the drivers
