First Knife from scratch
- bimbo
- 300 Win Mag
- Posts: 1791
- Joined: Tue Oct 10, 2006 10:34 pm
- Favourite Cartridge: 17HH
- Location: Newcastle, NSW
First Knife from scratch
Thought I would chuck up a couple of pics/progress of my first knife from scratch and some of the associated bits of kit I've made along the way.
I have been wanting to do this for ages but just never got around to it until my cousins husband who I hunt with asked me if I could make him a decent hunting knife. I told him I can make him a hunting knife, not sure about a decent one He is the kind of bloke who I know wouldn't take the extra time/effort to look after a carbon steel knife so I did some reading into which stainless steels can be heat treated easily at home and it looked like Sandvik 12c27 was one of the easier ones as well as being readily available and relatively cheap as far as knife steels go so I ordered some from Gameco/Artisan supplies. I would also need something to heat treat the steel which requires temps around 1000C so I also ordered their 9kg gas bottle forge kit which has a gas burner, regulator, high heat insulation and refractory to turn a 9kg gas cylinder into a gas forge capable of heat treating steel as well as being able to get hot enough to forge weld steel aka san mai/damascus /pattern welded steels (another potential project I'm sure).
While all that was in the post I rummaged through the scrap steel bin at work and acquired everything I needed including a 9kg gas bottle. Anyway I got stuck in and made the forge without taking any photos but anyone thinking of doing something similar there are a couple of good videos on youtube showing the process.
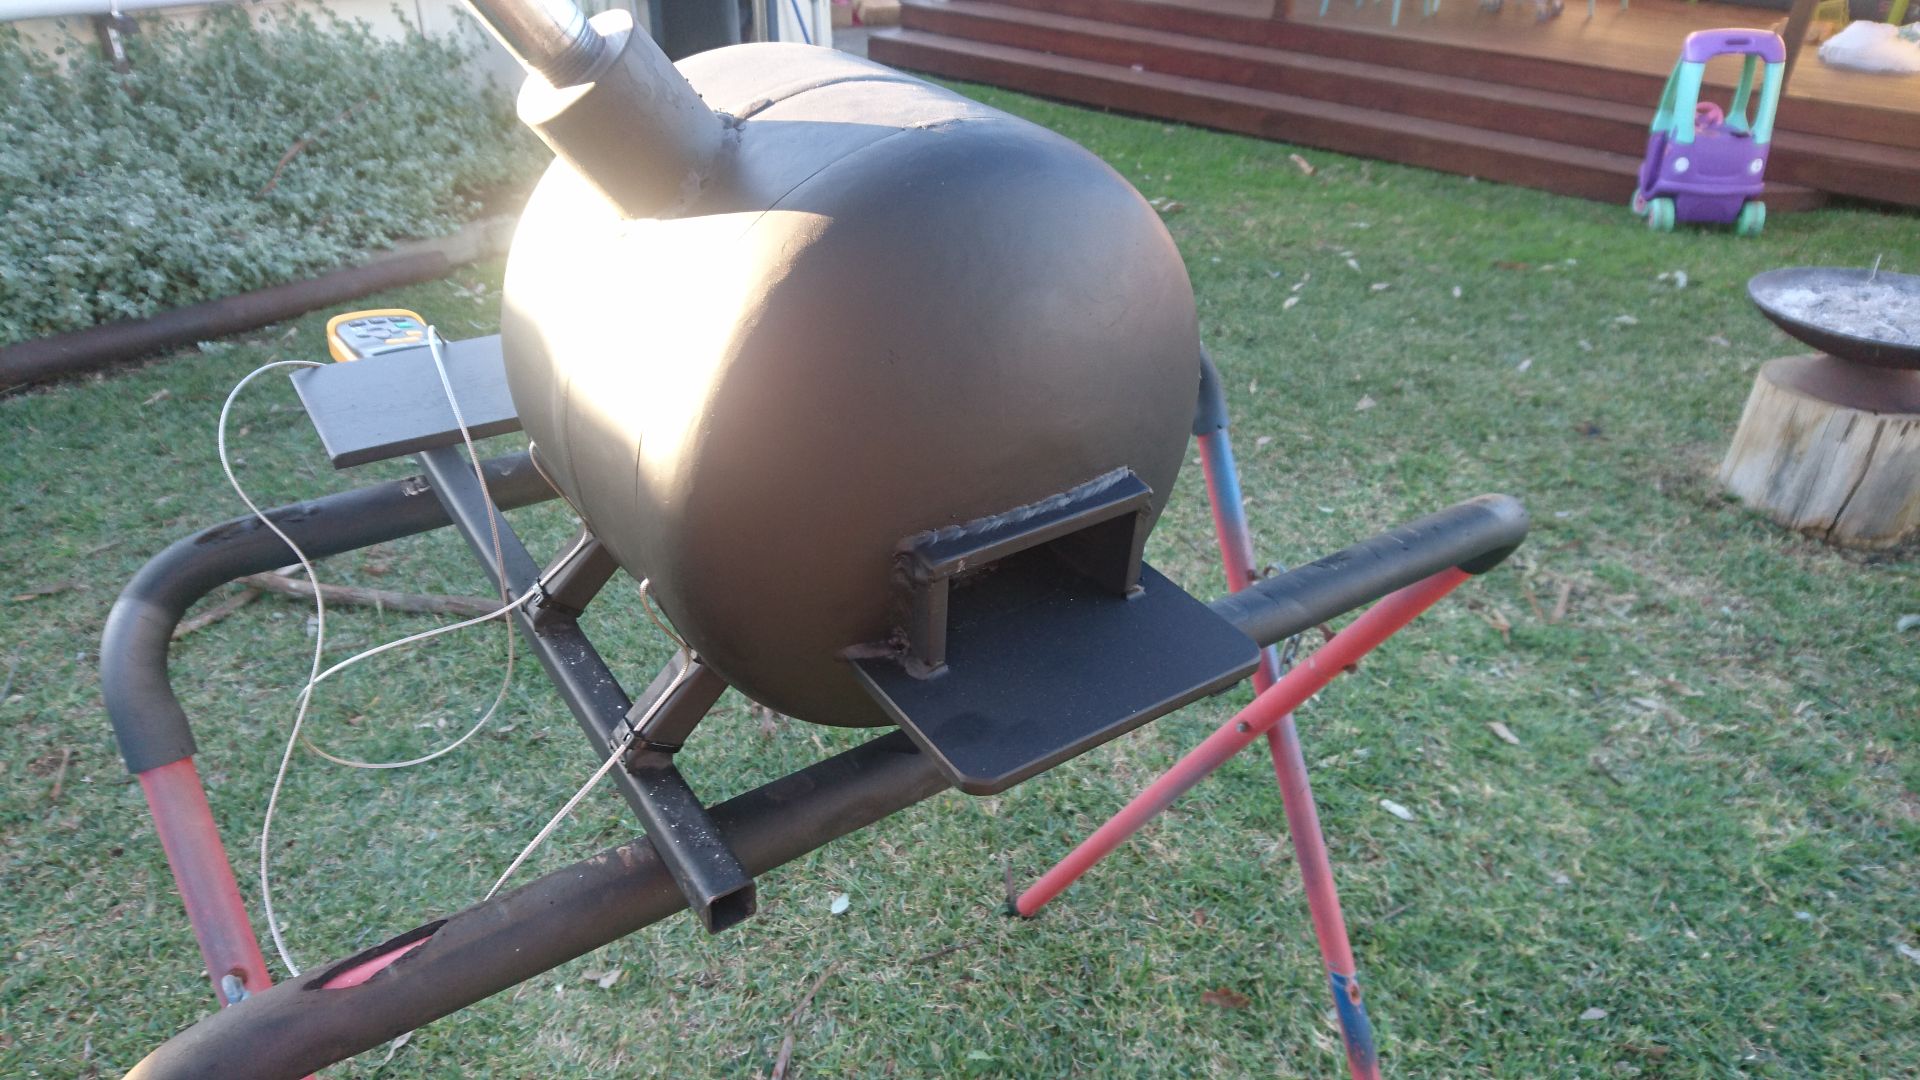
These pics are of the first series of firing starting at a few short bursts for the burner letting it cool in-between and letting it get hotter each time to drive off the moisture and cure the refractory without majorly cracking it. I also purchased a digital temp meter and high temp thermocouples which i inserted through the side of the forge.
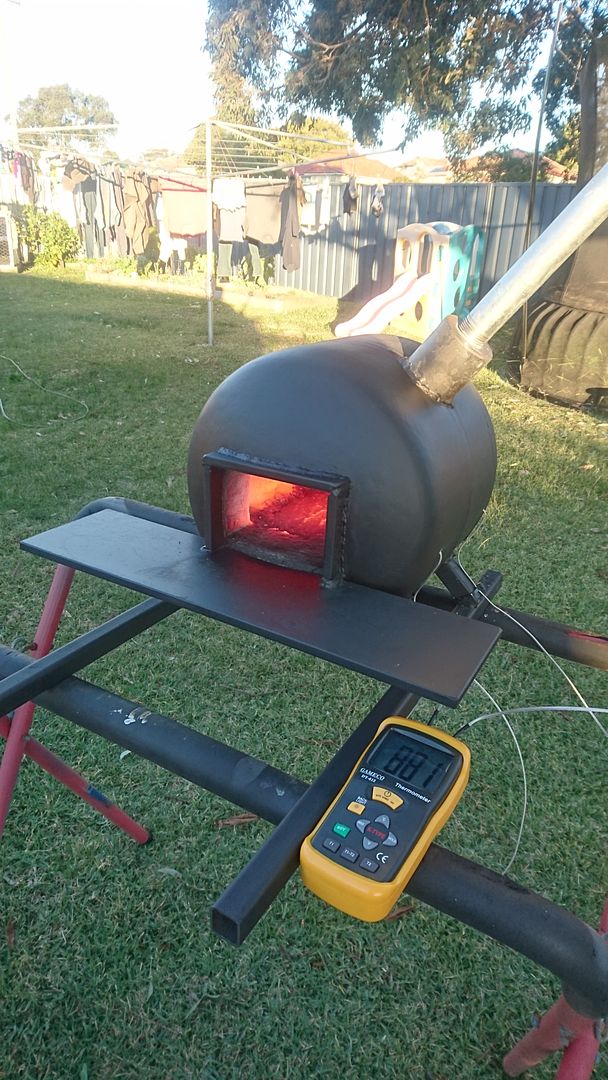
Also a hole in the back in case I want to make anything longer
Started off looking at the internet for drop point hunter designs and sketched out something on paper then when i was happy with the shape i cut out a thin plywood template to see how it felt in the hand and used that to transfer the design onto the bar of 12c27 which i think is 3.25mm thick and then cut out with a grinder and shaped on the linisher.
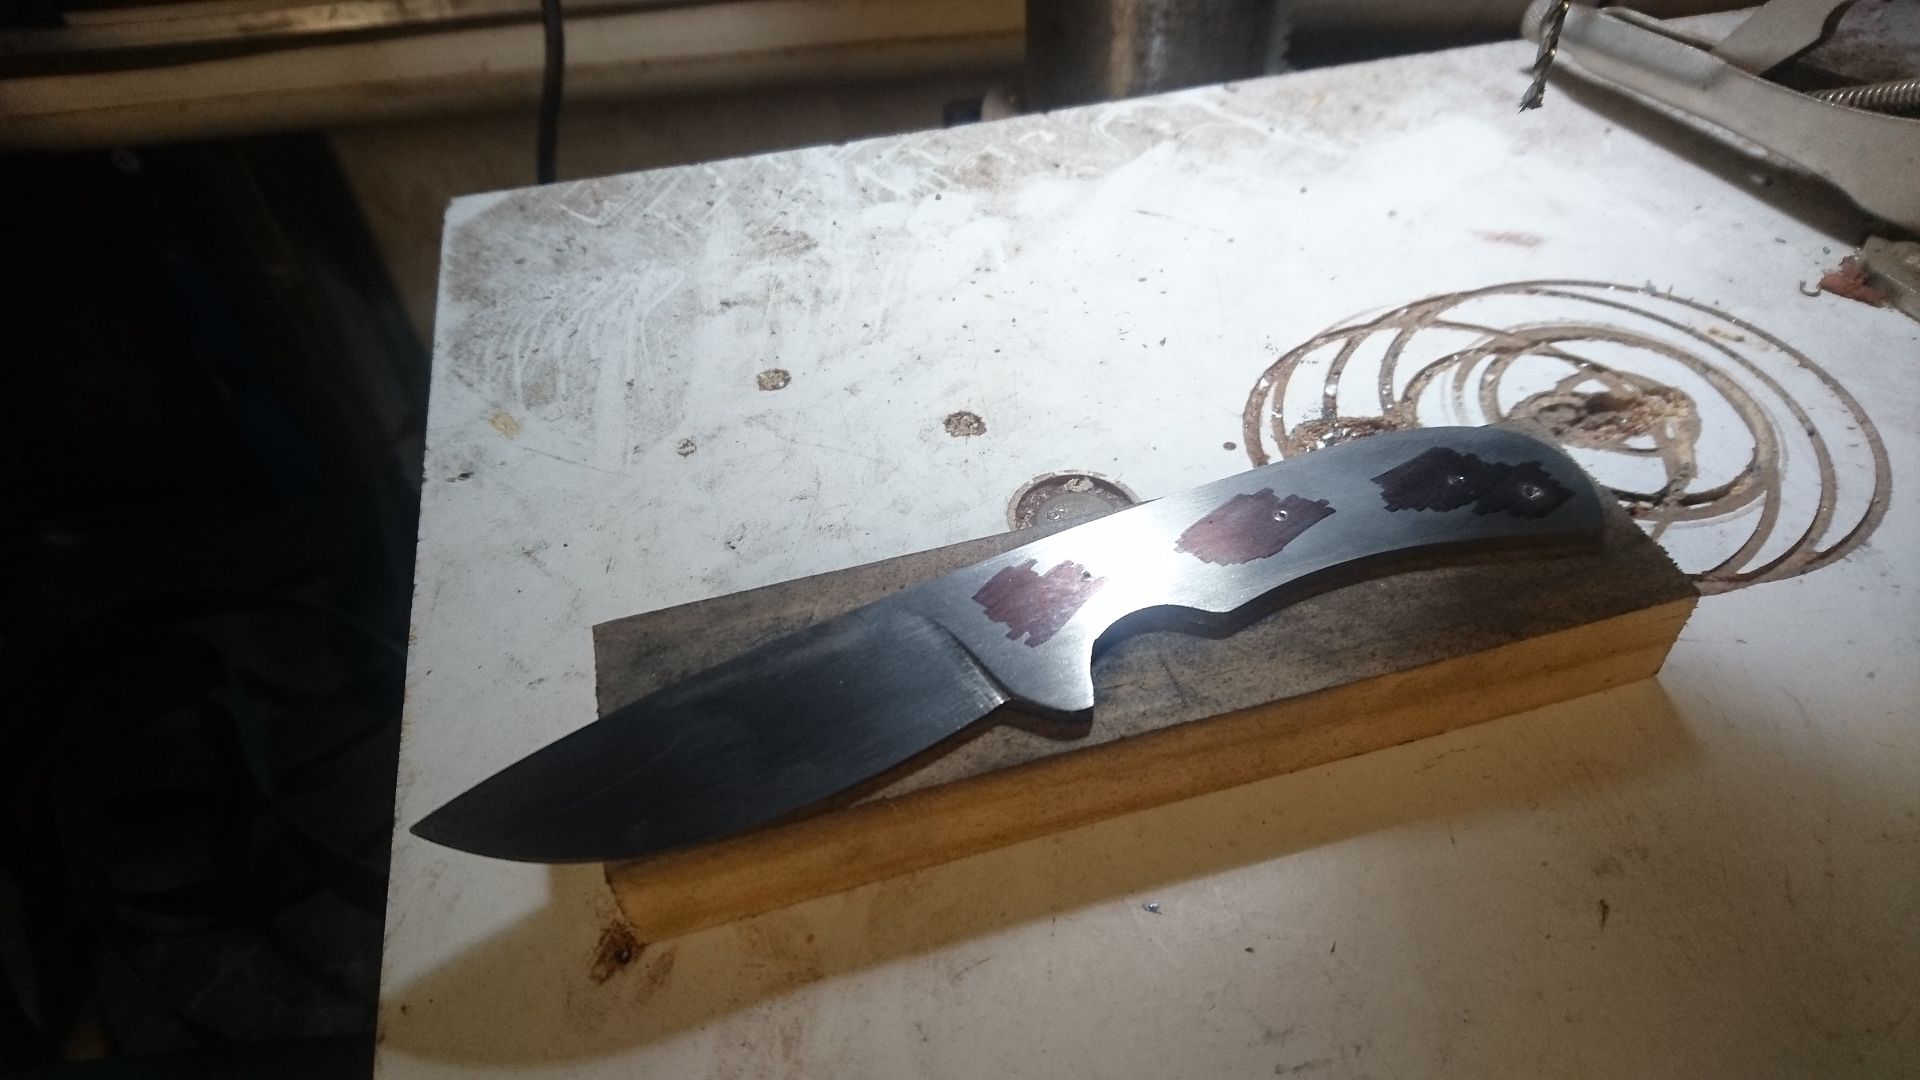
I then started the bevels using a hand file jig i knocked up from design i found on the net. Also knife number 2 blank cut out and in the que (japanese style Nakiri - vegetable knife). Knife was taken down to 1mm at the blade edge, not sure if this is too thick/thin though.
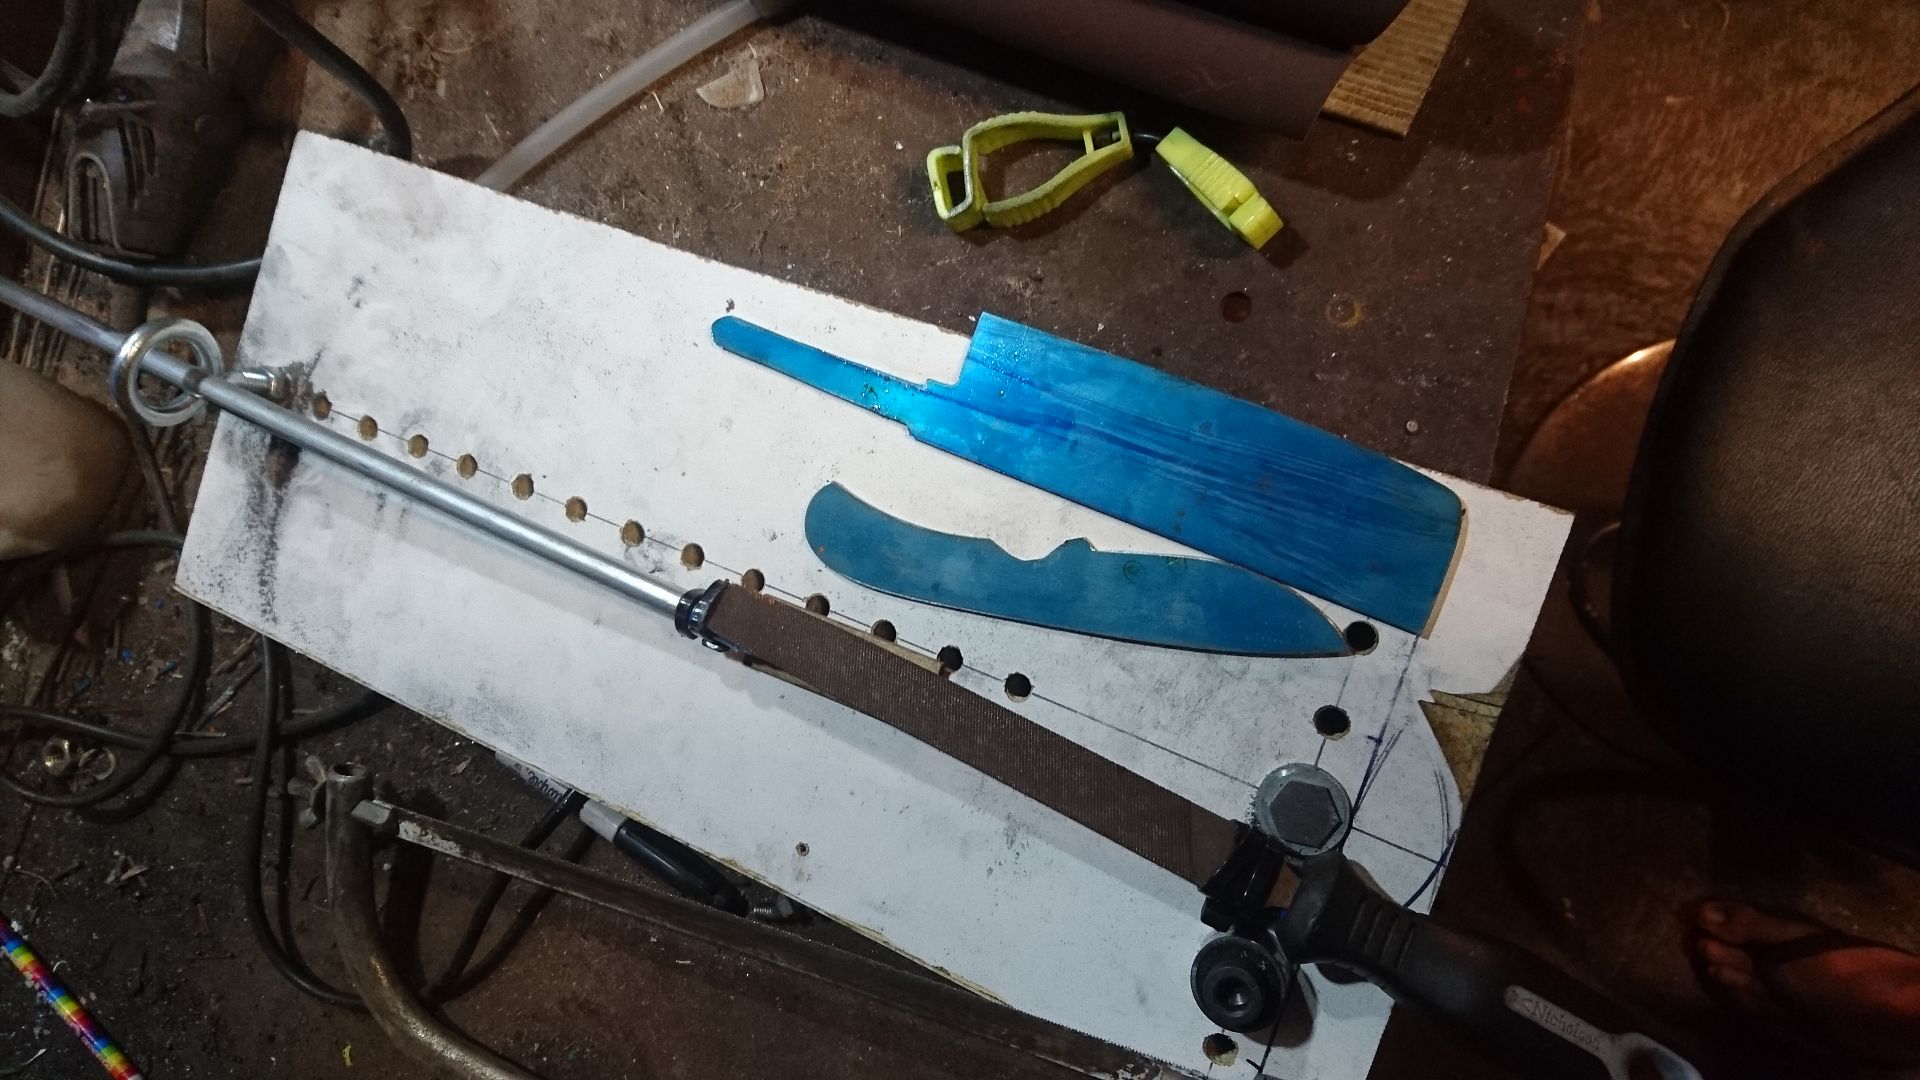
Holes marked out and drilled for handle pins before hardening
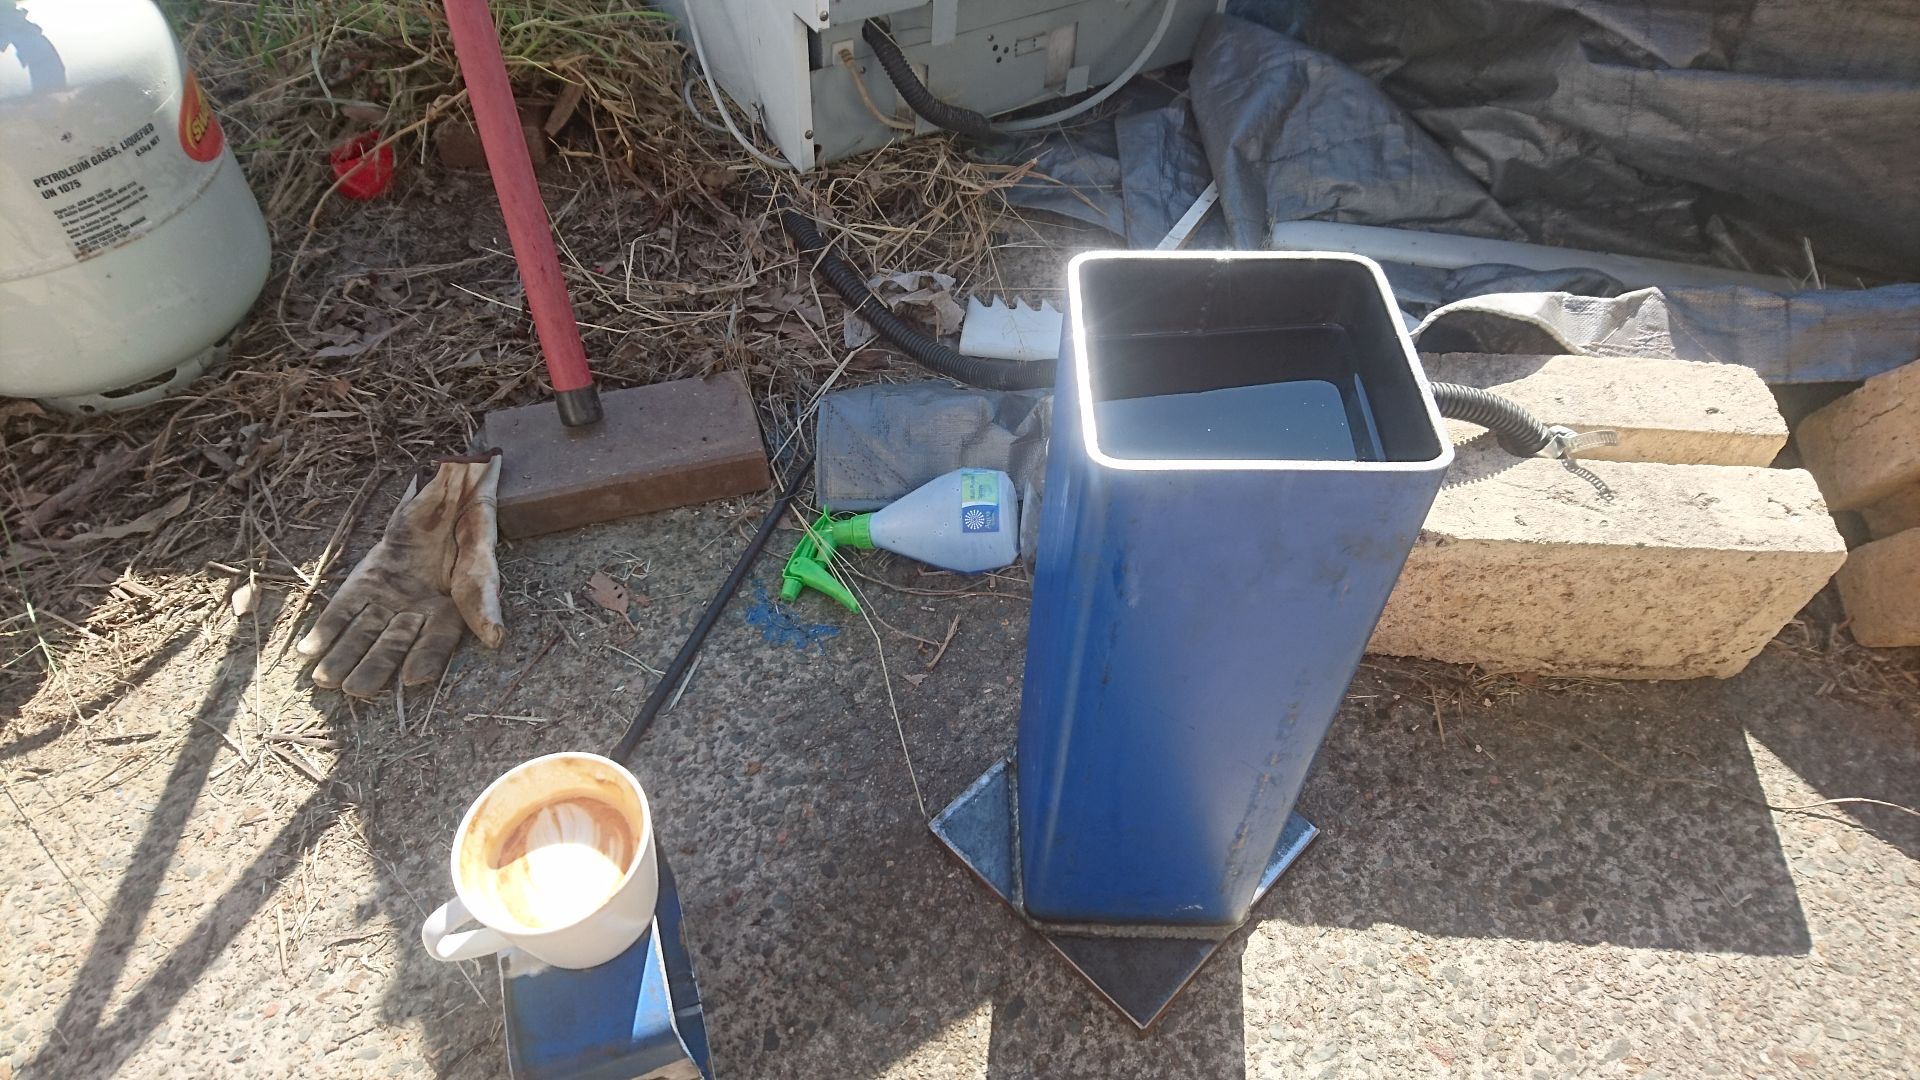
Oil quench tank made from salvaged steel holds about 8L of canola oil
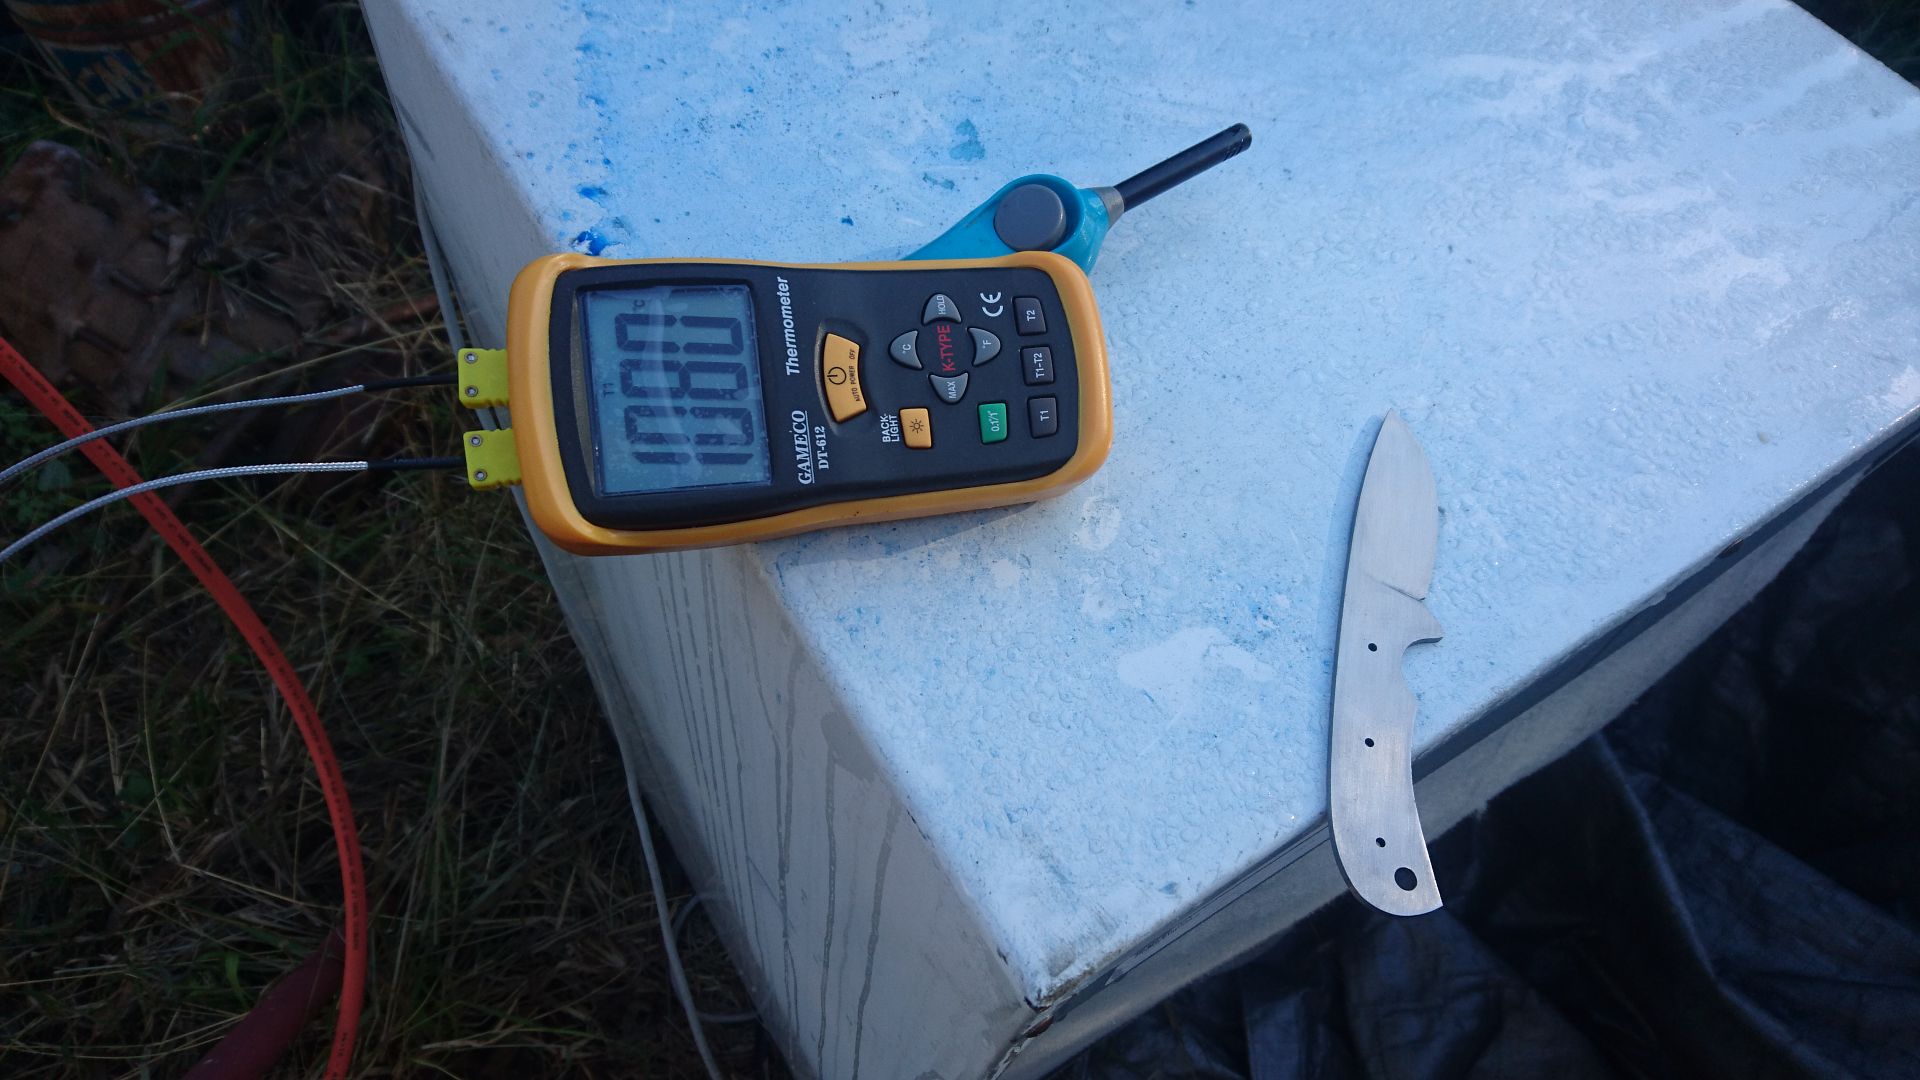
The forge was heated up and held at 1080C then blade went in for 6mins, pulled out and then quenced in the oil. All went well, I think, no warps or cracks then into the freezer to chill out for a few hours. My wife just shakes her head these days and mutters something like 'i'm not even going to ask what your doing now'
Knife ready for heat treat
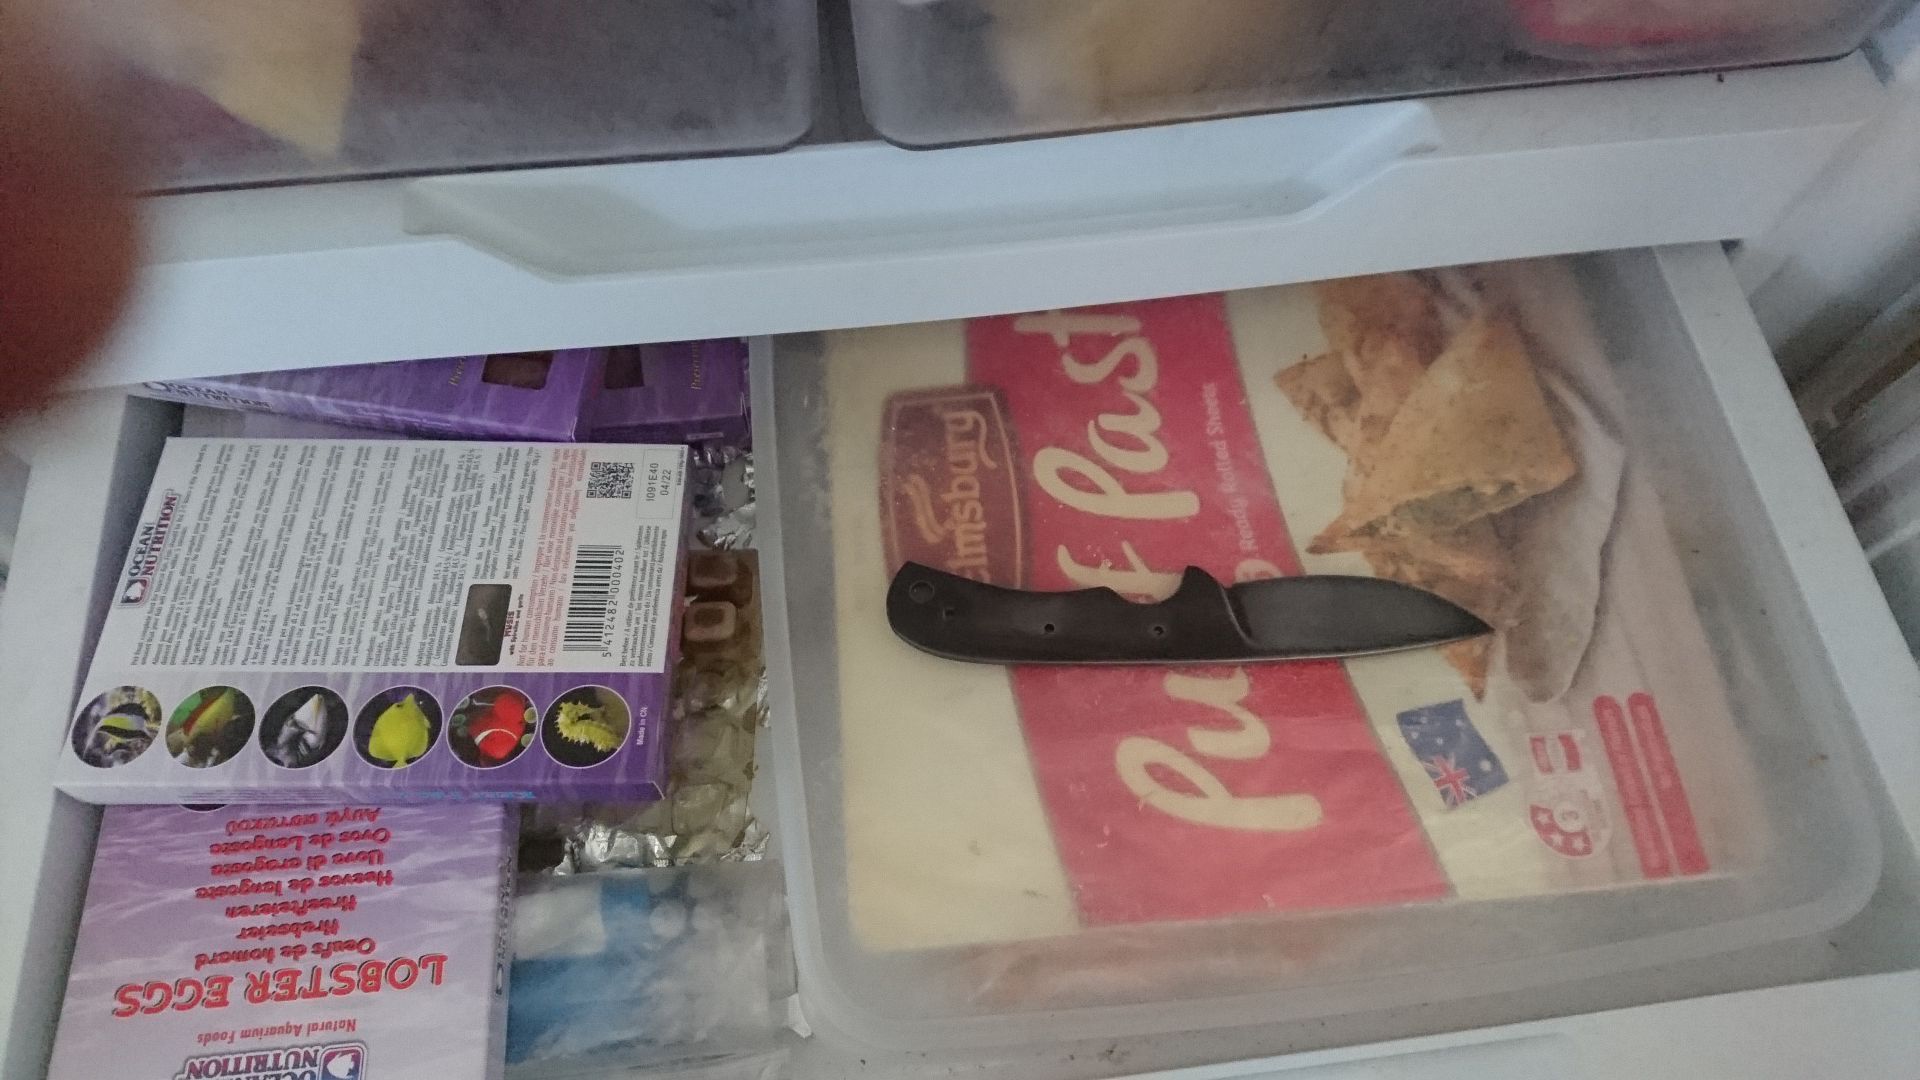
Knife chillin
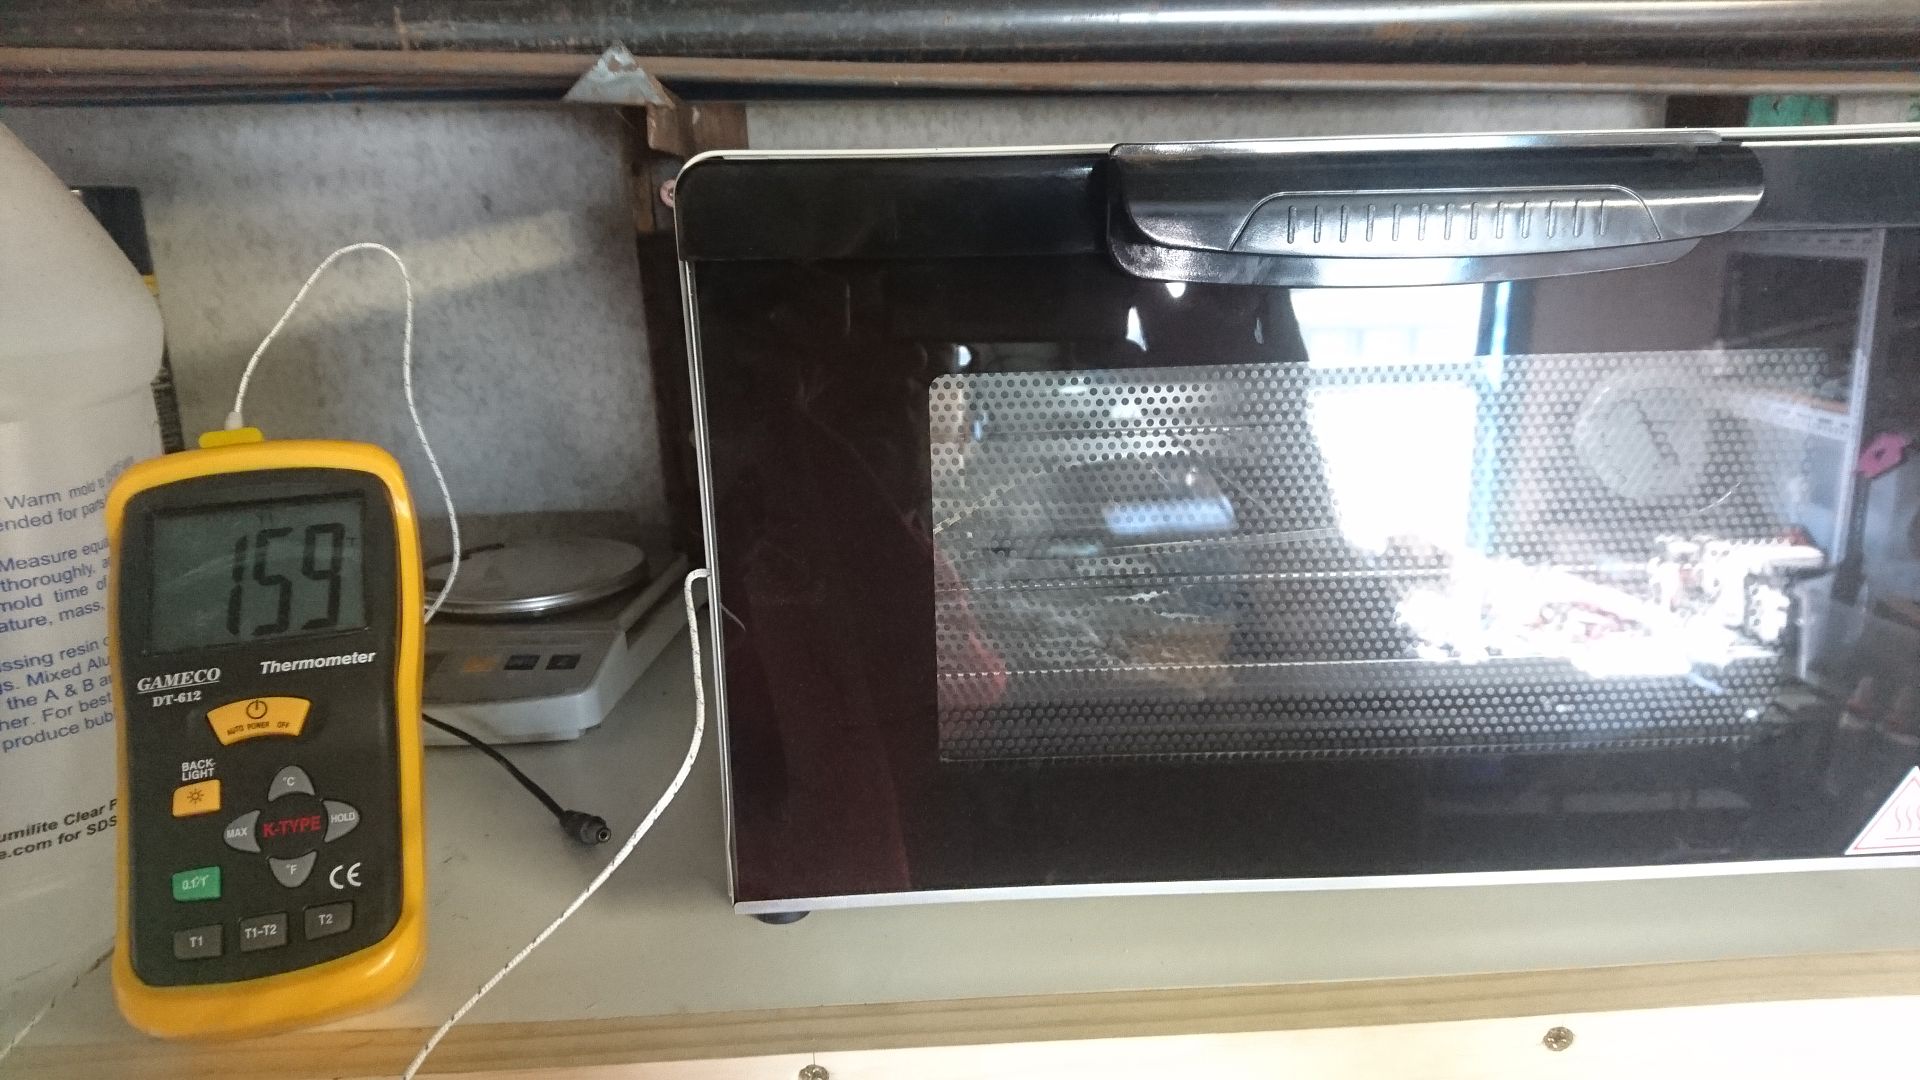
At this stage the blade is hard, too hard and brittle to be of any use so it gets tempered to soften the blade slightly. 160c for and hour then cool to room temp and repeat. I have a little toaster oven in my shed for drying timber, setting stabilised wood and now tempering knives that did the job nicely.
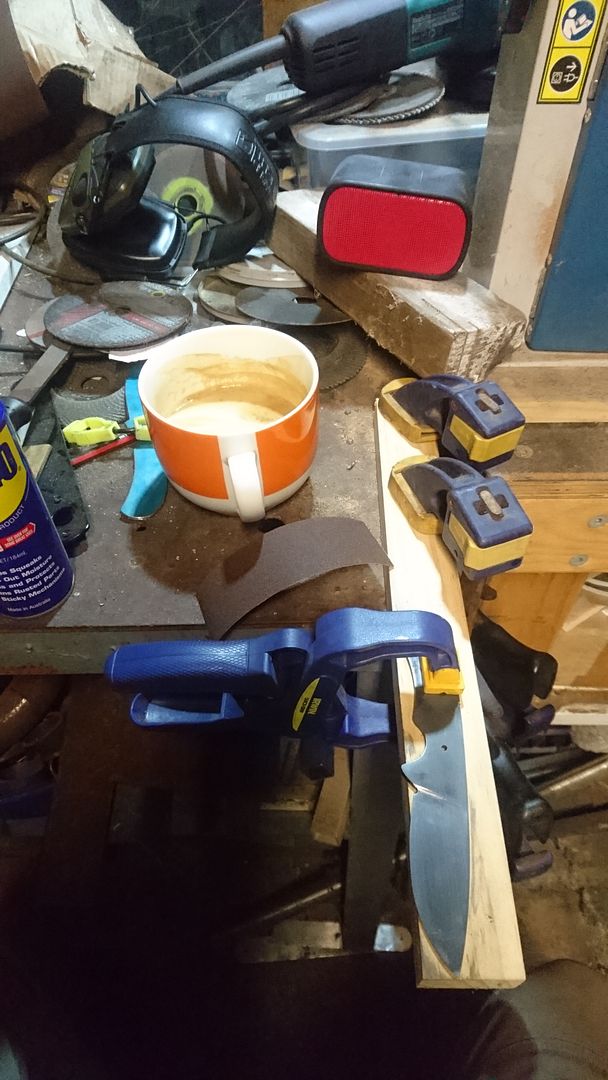
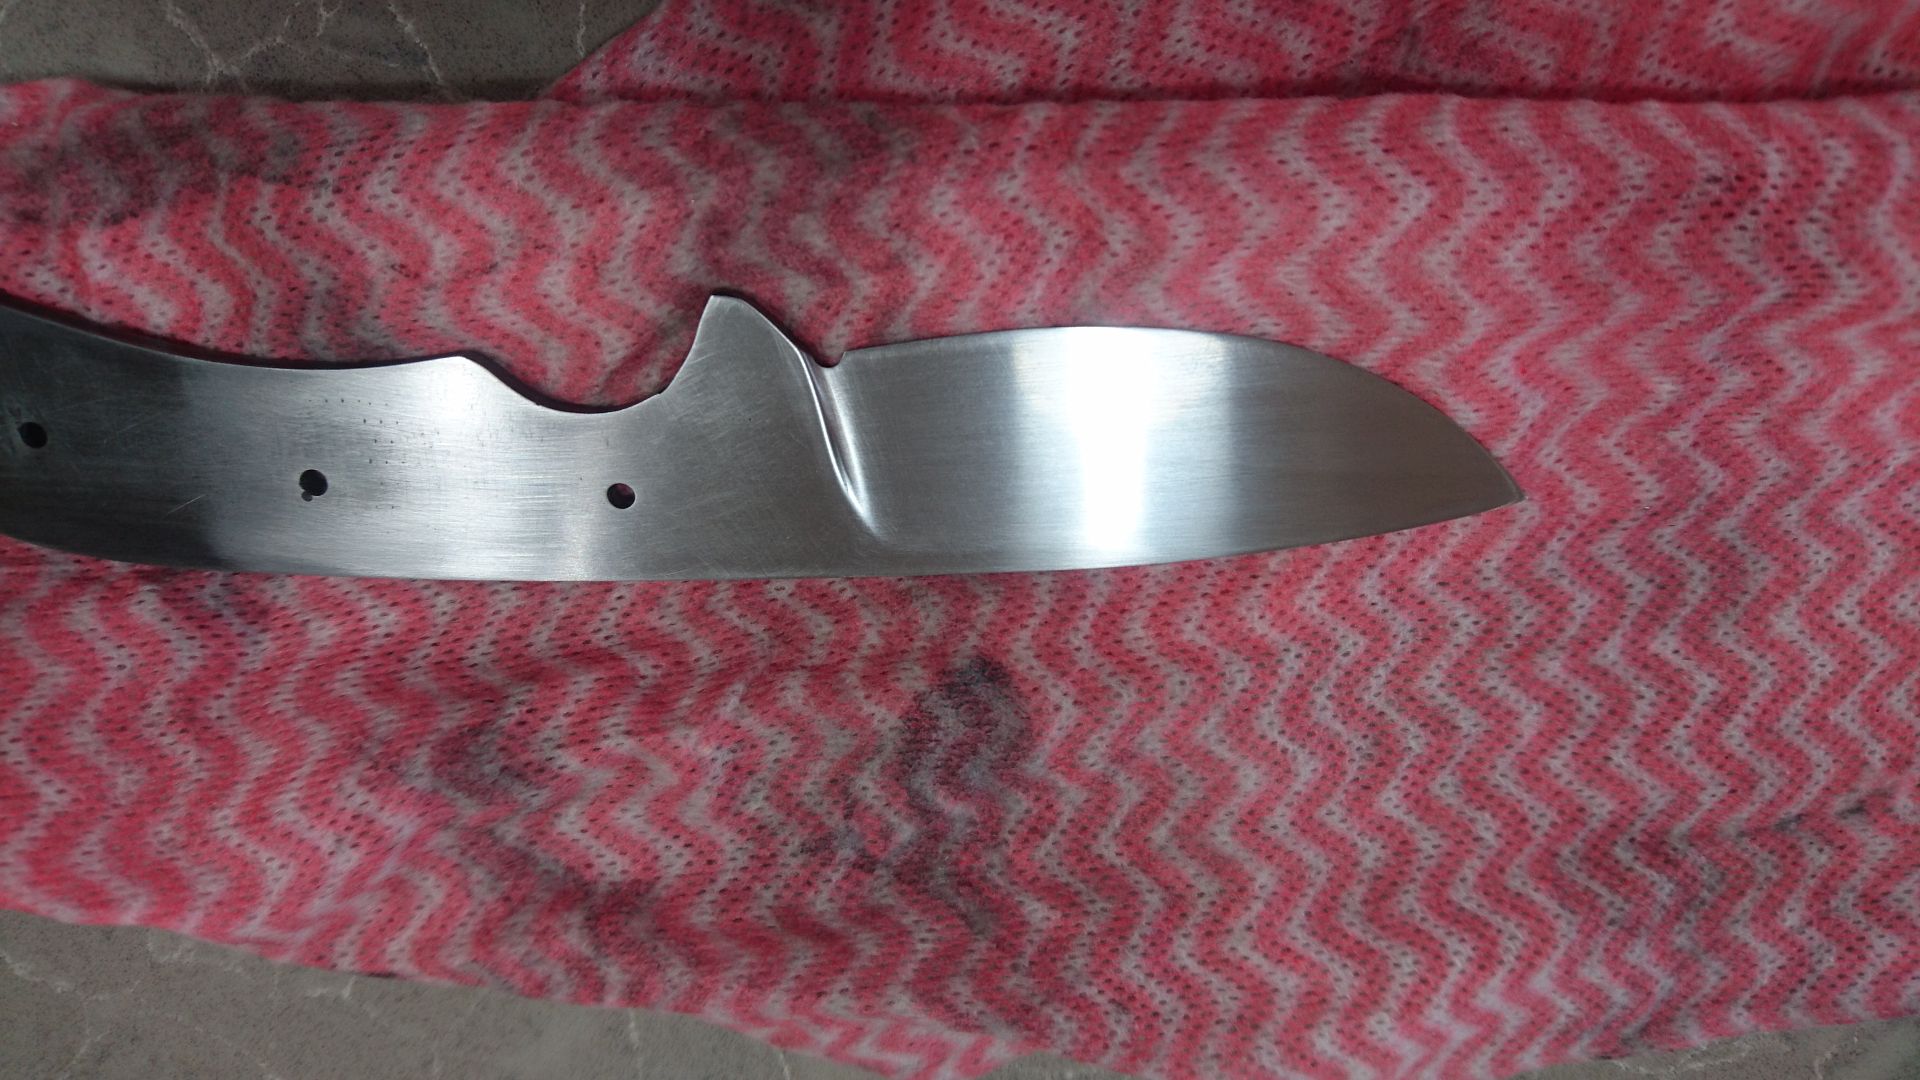
I finished up the grinds freehand on the linisher to 240 grit and then onto hand sanding all the way 1200 grit Not perfect by any stretch of the imagination but acceptable and mostly stuff that most others wouldn't notice.
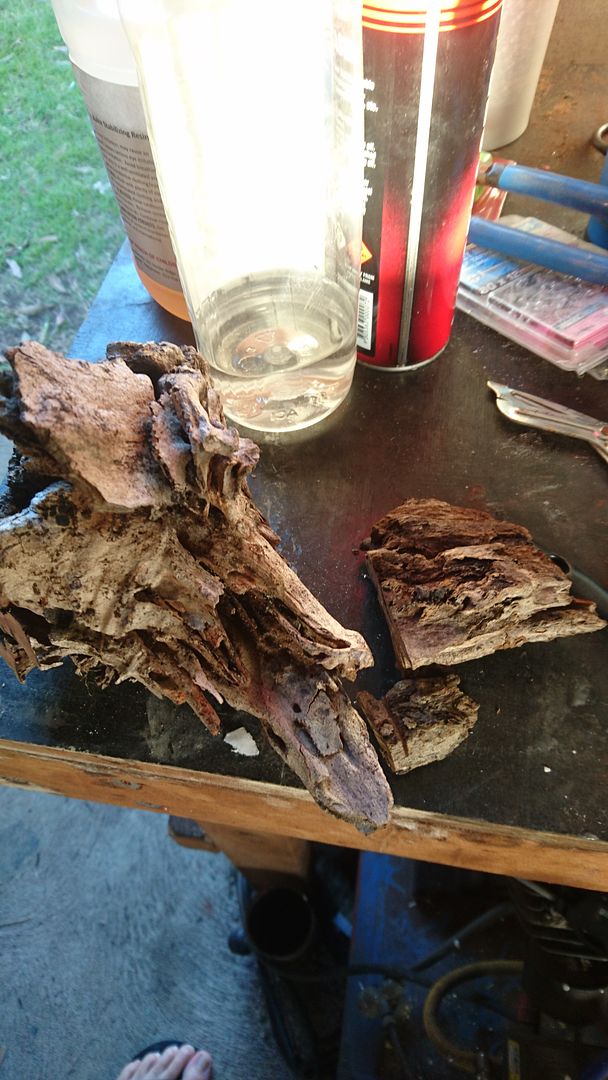
Next up was to sort out something for the handle. I have a bunch of burl and resin hybrid handles to choose from as well as some nice figured timbers but I thought I would go all sentimental on this one and use a piece of rotted wood i picked up a year or 2 ago from the farm we hunt on which is owned by my uncle and knife recipients father in law. Cut a piece off, hosed it off really well to get rid of the dirt and lose bits then into the oven to dry for a few hours
Then into a product called cactus juice which is a thin resin that is cured at 70C but to get the resin to soak in the wood the wood is put into a container then covered in the cactus juice and wood weighted down with some thick steel washers to stop it floating and the whole lot goes into a vacuum chamber which essentially sucks all the air out of the wood, this piece of wood was under vacuum for 2 days before it stopped bubbling away.
The vacuum is then released and in all the voids where the air has been removed the resin is sucked back into. The wood will soak here for another 2 days until it goes into the oven to cure. I have had bits of wood that keep bubbling for a week or more so its not a fast process with hard aussie woods but means that the wood will be resin impregnated and should be very stable and hard. This is especially good with this piece as it has some really soft rotted pieces in it.
That's where I'm up to at this stage but next step after curing the wood will be to cast the wood in some polyurethane resin to form a usable block for the handle
Cheers
James
I have been wanting to do this for ages but just never got around to it until my cousins husband who I hunt with asked me if I could make him a decent hunting knife. I told him I can make him a hunting knife, not sure about a decent one He is the kind of bloke who I know wouldn't take the extra time/effort to look after a carbon steel knife so I did some reading into which stainless steels can be heat treated easily at home and it looked like Sandvik 12c27 was one of the easier ones as well as being readily available and relatively cheap as far as knife steels go so I ordered some from Gameco/Artisan supplies. I would also need something to heat treat the steel which requires temps around 1000C so I also ordered their 9kg gas bottle forge kit which has a gas burner, regulator, high heat insulation and refractory to turn a 9kg gas cylinder into a gas forge capable of heat treating steel as well as being able to get hot enough to forge weld steel aka san mai/damascus /pattern welded steels (another potential project I'm sure).
While all that was in the post I rummaged through the scrap steel bin at work and acquired everything I needed including a 9kg gas bottle. Anyway I got stuck in and made the forge without taking any photos but anyone thinking of doing something similar there are a couple of good videos on youtube showing the process.
These pics are of the first series of firing starting at a few short bursts for the burner letting it cool in-between and letting it get hotter each time to drive off the moisture and cure the refractory without majorly cracking it. I also purchased a digital temp meter and high temp thermocouples which i inserted through the side of the forge.
Also a hole in the back in case I want to make anything longer
Started off looking at the internet for drop point hunter designs and sketched out something on paper then when i was happy with the shape i cut out a thin plywood template to see how it felt in the hand and used that to transfer the design onto the bar of 12c27 which i think is 3.25mm thick and then cut out with a grinder and shaped on the linisher.
I then started the bevels using a hand file jig i knocked up from design i found on the net. Also knife number 2 blank cut out and in the que (japanese style Nakiri - vegetable knife). Knife was taken down to 1mm at the blade edge, not sure if this is too thick/thin though.
Holes marked out and drilled for handle pins before hardening
Oil quench tank made from salvaged steel holds about 8L of canola oil
The forge was heated up and held at 1080C then blade went in for 6mins, pulled out and then quenced in the oil. All went well, I think, no warps or cracks then into the freezer to chill out for a few hours. My wife just shakes her head these days and mutters something like 'i'm not even going to ask what your doing now'
Knife ready for heat treat
Knife chillin
At this stage the blade is hard, too hard and brittle to be of any use so it gets tempered to soften the blade slightly. 160c for and hour then cool to room temp and repeat. I have a little toaster oven in my shed for drying timber, setting stabilised wood and now tempering knives that did the job nicely.
I finished up the grinds freehand on the linisher to 240 grit and then onto hand sanding all the way 1200 grit Not perfect by any stretch of the imagination but acceptable and mostly stuff that most others wouldn't notice.
Next up was to sort out something for the handle. I have a bunch of burl and resin hybrid handles to choose from as well as some nice figured timbers but I thought I would go all sentimental on this one and use a piece of rotted wood i picked up a year or 2 ago from the farm we hunt on which is owned by my uncle and knife recipients father in law. Cut a piece off, hosed it off really well to get rid of the dirt and lose bits then into the oven to dry for a few hours
Then into a product called cactus juice which is a thin resin that is cured at 70C but to get the resin to soak in the wood the wood is put into a container then covered in the cactus juice and wood weighted down with some thick steel washers to stop it floating and the whole lot goes into a vacuum chamber which essentially sucks all the air out of the wood, this piece of wood was under vacuum for 2 days before it stopped bubbling away.
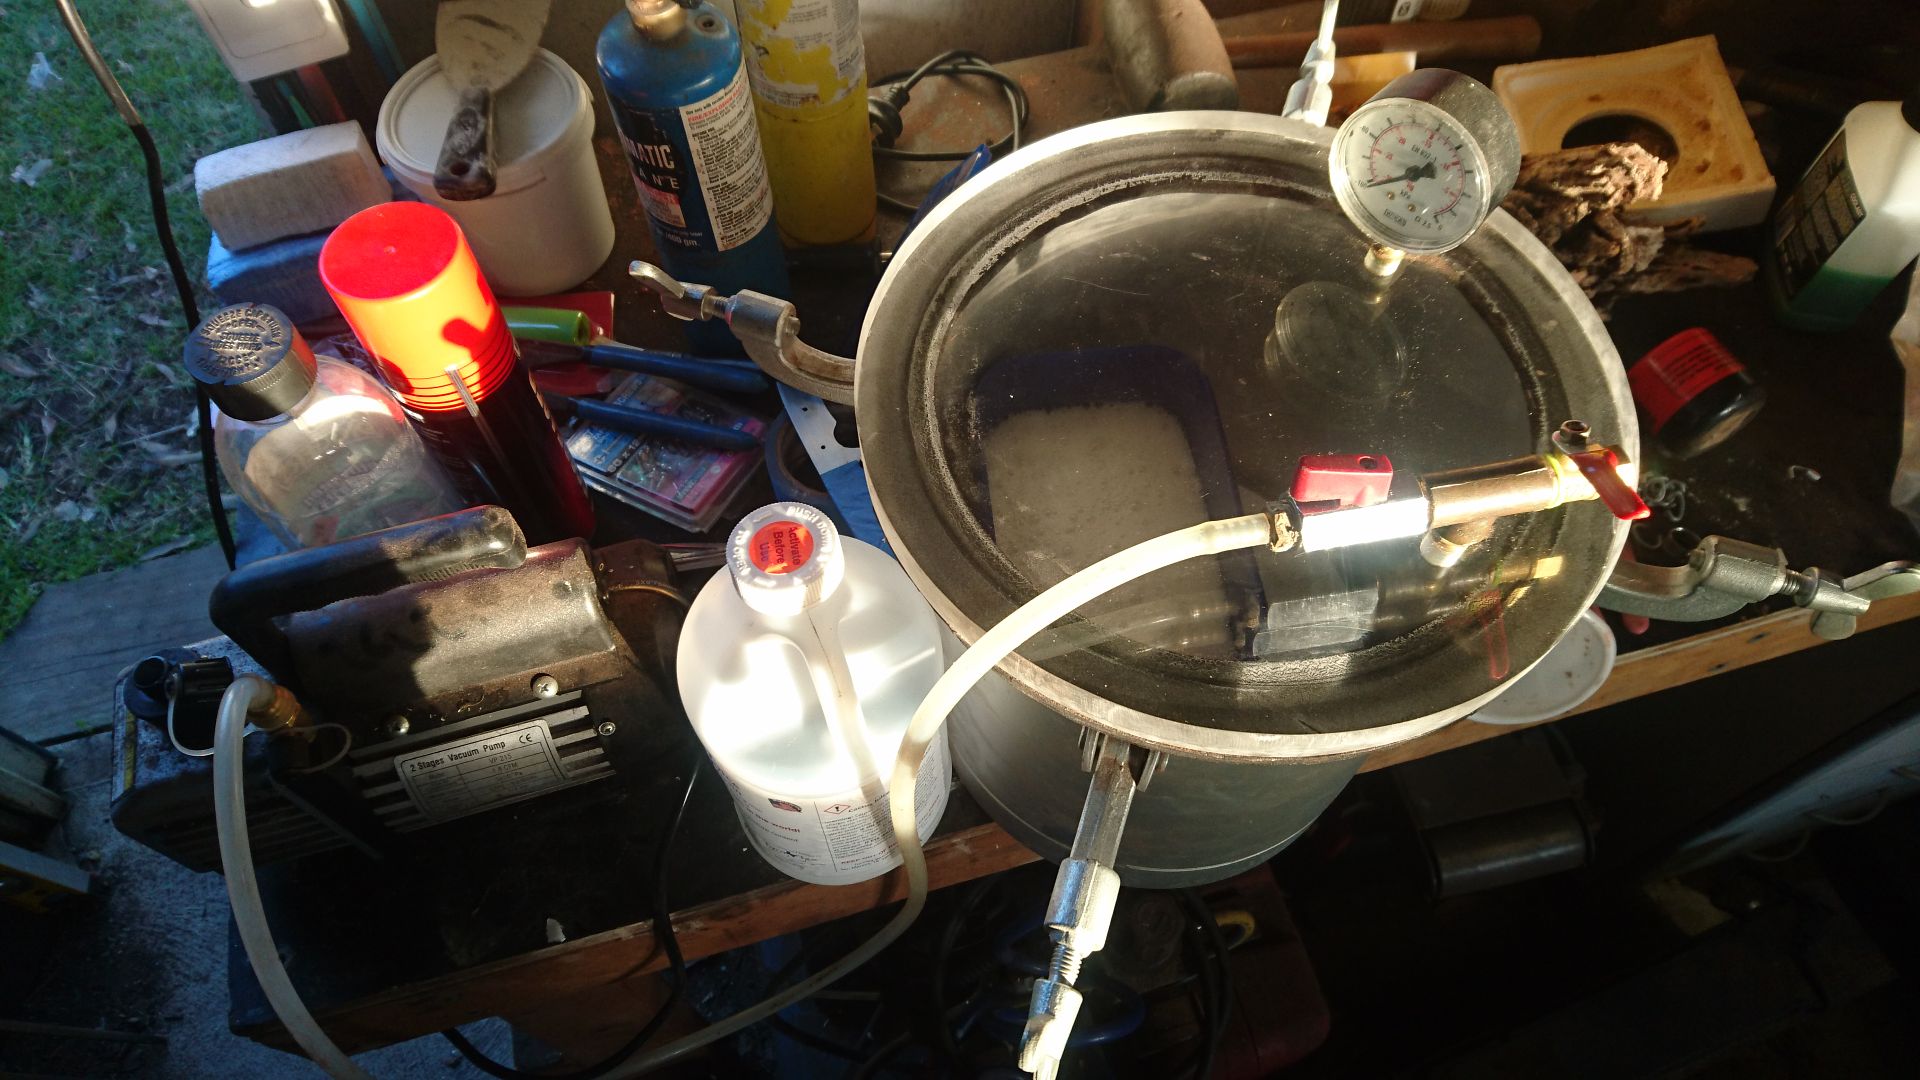
The vacuum is then released and in all the voids where the air has been removed the resin is sucked back into. The wood will soak here for another 2 days until it goes into the oven to cure. I have had bits of wood that keep bubbling for a week or more so its not a fast process with hard aussie woods but means that the wood will be resin impregnated and should be very stable and hard. This is especially good with this piece as it has some really soft rotted pieces in it.
That's where I'm up to at this stage but next step after curing the wood will be to cast the wood in some polyurethane resin to form a usable block for the handle
Cheers
James
- LoneRider
- 50 BMG
- Posts: 3899
- Joined: Thu May 22, 2008 10:20 pm
- Favourite Cartridge: 308
- Location: rubyvale,Central Qld
Re: First Knife from scratch
very nice jamie,i think a power hammer is in your future [and an anvil]
there might even be a something from up here in september. [if i remember it]
- mick_762
- 50 BMG
- Posts: 4156
- Joined: Sun Mar 04, 2012 1:46 pm
- Favourite Cartridge: 308 Norma
- Location: Wodonga Vic
Re: First Knife from scratch
Bloody good read James, look forward to the next installment.
- Camel
- Ultimate AusVarminter
- Posts: 12084
- Joined: Sat May 28, 2011 8:51 pm
- Favourite Cartridge: 20-222 6x47 rem, 250
- Location: Northern Riverina NSW
Re: First Knife from scratch
Going all out on this one James, well done.
- trevort
- Spud Gun
- Posts: 12710
- Joined: Thu Sep 14, 2006 9:21 pm
- Favourite Cartridge: Tater
- Location: Melbourne
Re: First Knife from scratch
dead jealous
I've been wanting to do this ever since I saw forged in fire. My "special abilities" deter me
I chopped up a shitload of the stag that no one wanted to eat tonight and managed yo slice into my index finger, then trying to avoid hurting my finger in the teacup handle, I managed to pour tea down my chest, Enough to leave a nice big red mark.
I think I will have to watch your progress for vicarious enjoyment as a forge could end me
-
- .308 Winchester
- Posts: 1586
- Joined: Thu Feb 15, 2007 8:31 pm
- Favourite Cartridge: 7-08
- Location: Far south coast NSW
Re: First Knife from scratch
Looking very nice some time and money invested wisely.
-
- 50 BMG
- Posts: 3991
- Joined: Sun Jan 07, 2007 11:54 am
- Favourite Cartridge: 260 Rem
- Location: Lilydale Vic
Re: First Knife from scratch
Updates James, updates.......
Sent from my iPhone using Tapatalk Pro
-
- 7mm08 Rem
- Posts: 868
- Joined: Sun Aug 05, 2018 7:25 pm
- Favourite Cartridge: 358ME
- Location: Ipswich Qld
Re: First Knife from scratch
Shit hot James. The forge looks and works great and the knife is looking great too. Just if I may say a couple of things. You only really need to soak that steel for say 5mins so long as you keep the heat constant, bet there was a fair bit of black shit to sand off with the extra minute as it burns a bit more carbon out of the steel. It won't make much difference anyway. Quenching in oil actually makes it a 1 or 2RC harder and the oven at 160 I think your knife is going to be very hard, maybe like around 60RC. With 12c27 they always say half hour at 165 to give you around 59RC. With the oil quench and the lower temp I reckon 60 would be close. I always give mine three quarters of an hour myself and let it cool then do it again, so I reckon you have it just about down pat mate. Being around 60RC will only make it a bit harder to sharpen but will hold an edge longer, so a great job for your first one mate. Wish my first one looked as good as that. Well doe, can't wait to see it finished.
One other thing mate, buy two nice thick pieces of aluminium about 18inches or a tad longer and about five inches wide, maybe one inch or 3/4inch thick, then forget the oil and quench your knife between them. When its at 1080 and glowing, you put it between the plates and stand on them and it will be cool enough to hold in your hand in less than a minute. It only has to cool to around 400 c in the first minute and the plates get it below that in about 25seconds. Your knives will always turn out dead straight and flat that way, no worries about warping from dipping in oil.
All the best mate
- bimbo
- 300 Win Mag
- Posts: 1791
- Joined: Tue Oct 10, 2006 10:34 pm
- Favourite Cartridge: 17HH
- Location: Newcastle, NSW
Re: First Knife from scratch
Thanks heaps Ted. For the heat treat process I did a bit of reading and then pretty much followed this guide that Bjorn wrote https://creativeman.com.au/blog/how-to- ... ess-steel/ and the Sandvik data sheet, somewhere in there was a table with soak time vs thickness and that is how I came up with the soak time but thinking about it now the blade edge is going to heat up way faster than the spine so the 5min soak time would be ample as you say. As for quench plate I had read about them but not really looked into it but it is easy for me to get some 16mm ally from work and even bolt some together to get more thickness but as I'm looking at doing some kitchen knives which i imagine being long and relatively thin will be more prone to warping so clamping between 2 flat surfaces sounds like a good idea.
No other updates yet, the wood is still soaking and I'll pull it our and cure tomorrow afternoon and hopefully cast in resin if I get time. I did start sanding/grinding the kitchen knife but its too cold in the shed now to do any more sanding of head back out there to take pics
- Glenn
- 375 Cheytac
- Posts: 1433
- Joined: Tue Apr 10, 2007 5:14 pm
- Favourite Cartridge: 300WM
- Location: Victoria
Re: First Knife from scratch
Well.done James!
Forge looks good.
Glenn
Forge looks good.
Glenn
- bimbo
- 300 Win Mag
- Posts: 1791
- Joined: Tue Oct 10, 2006 10:34 pm
- Favourite Cartridge: 17HH
- Location: Newcastle, NSW
Re: First Knife from scratch
- DSD
- .270 Winchester
- Posts: 1446
- Joined: Wed Jul 17, 2013 9:06 pm
- Favourite Cartridge: N/A
- Location: In hiding
Re: First Knife from scratch
-
- 50 BMG
- Posts: 3991
- Joined: Sun Jan 07, 2007 11:54 am
- Favourite Cartridge: 260 Rem
- Location: Lilydale Vic
Re: First Knife from scratch
Are they from Lara James?
Sent from my iPad using Tapatalk Pro
- LoneRider
- 50 BMG
- Posts: 3899
- Joined: Thu May 22, 2008 10:20 pm
- Favourite Cartridge: 308
- Location: rubyvale,Central Qld
Re: First Knife from scratch
HAHAhahahahahahatrevort wrote: ↑Tue Aug 06, 2019 12:06 am dead jealous
I've been wanting to do this ever since I saw forged in fire. My "special abilities" deter me
I chopped up a shitload of the stag that no one wanted to eat tonight and managed yo slice into my index finger, then trying to avoid hurting my finger in the teacup handle, I managed to pour tea down my chest, Enough to leave a nice big red mark.
I think I will have to watch your progress for vicarious enjoyment as a forge could end me
- bimbo
- 300 Win Mag
- Posts: 1791
- Joined: Tue Oct 10, 2006 10:34 pm
- Favourite Cartridge: 17HH
- Location: Newcastle, NSW
Re: First Knife from scratch
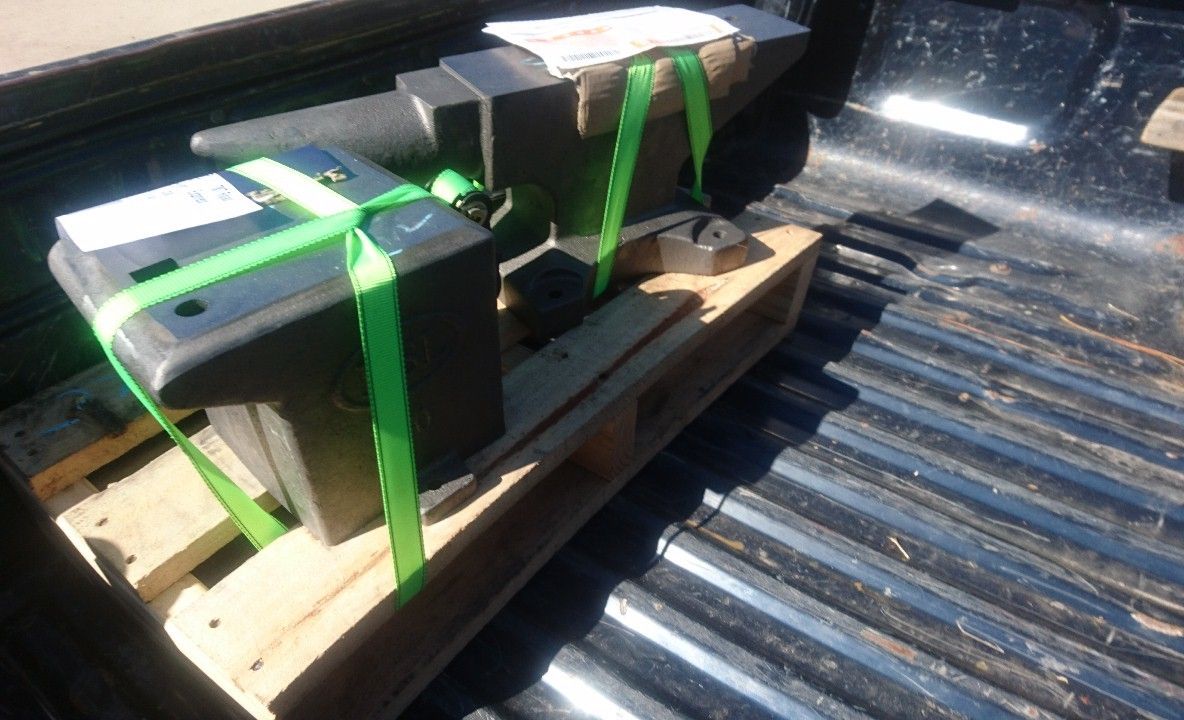
Awesome anvil DSD, is it one of the ones designed by Bruce beamish?DSD wrote: ↑Wed Aug 07, 2019 1:35 pmWe had an anvil turn up at work to, only i delivered it there Sunday after picking it up.
Sent from my SM-G930F using Tapatalk
Yep that's the oneskickinback wrote: ↑Wed Aug 07, 2019 6:41 pm Are they from Lara James?
Sent from my iPad using Tapatalk Pro