
DIY - New Build Project

Re: DIY - New Build Project
G'day Bruce they would be OK for the first 9mm from either side then the going could get a bit tough 

Re: DIY - New Build Project
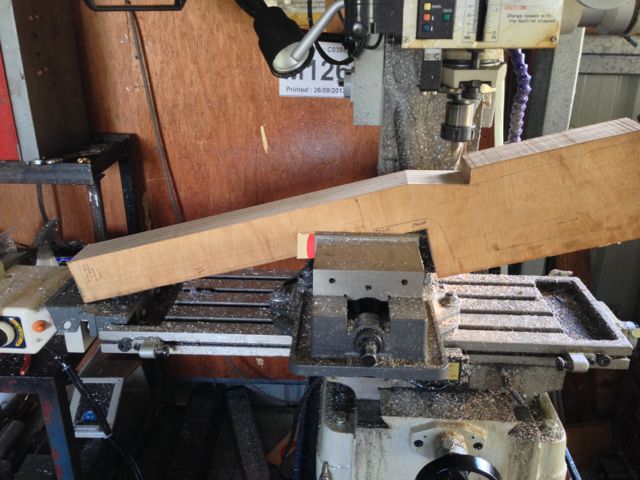
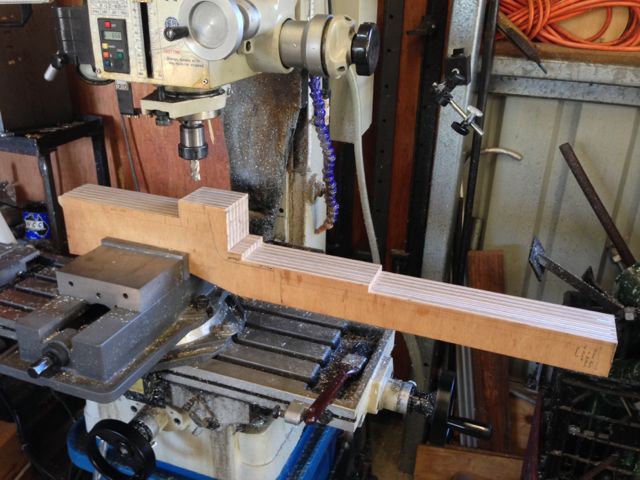
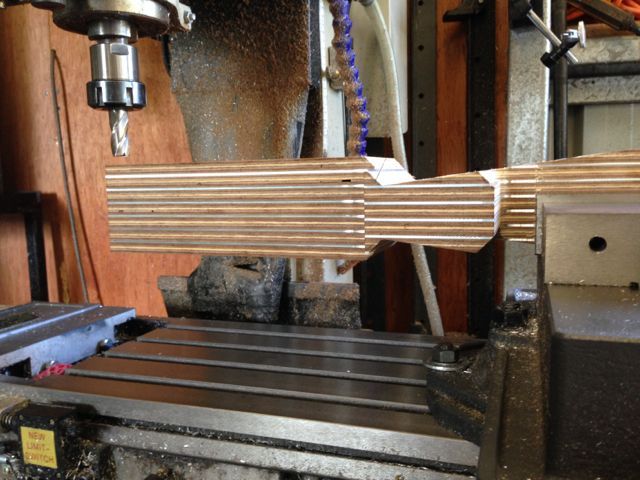
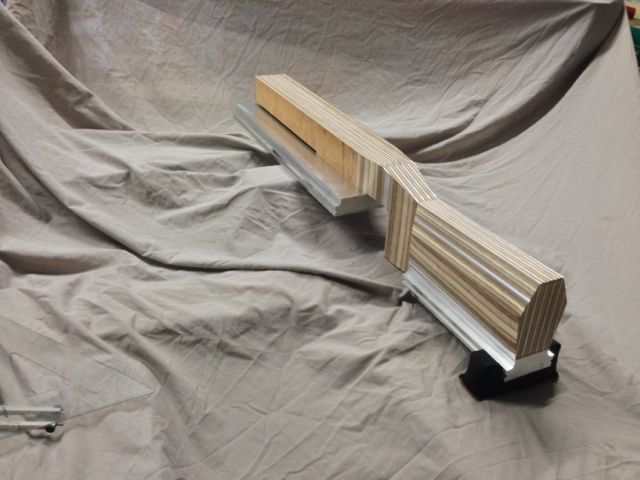
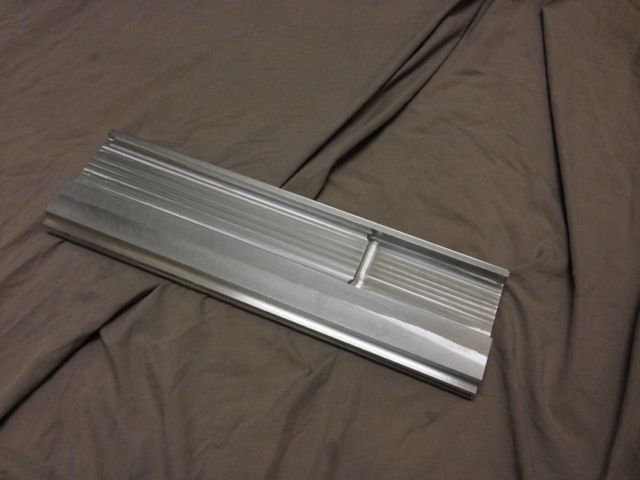
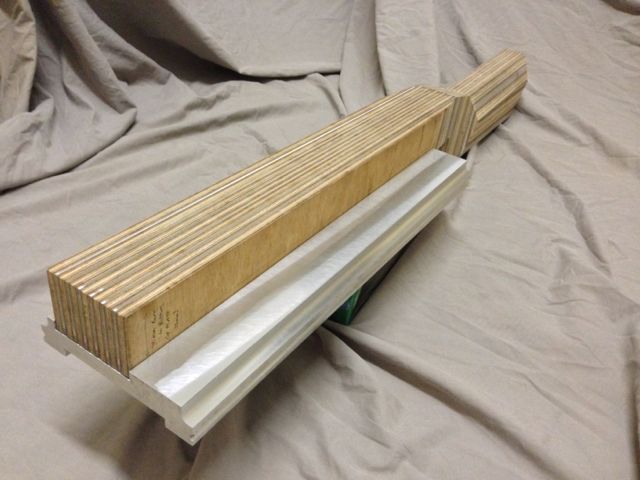
OK latest photo of progress in starting to shape the stock - all top surfaces milled flat and straight and will be used as the datum to measure and shape the rest of the stock off. The main part is the top of the fore-end as that will be where all other bottom surfaces will be aligned to in the finishing of the stock to make sure all is straight and parallel as that will essentially be the bore line for the barrelled action.
Still have not worked out what I am going to do in the pistol grip part of the stock yet....... at this stage have traced the shape from my other stock but not sure I want to go down that path for shaping it as I am looking to keep as many of the layers of alloy continuous through the full length of the stock as possible. Will see what can be done once I get the bottom surfaces cut to shape
Still have not worked out what I am going to do in the pistol grip part of the stock yet....... at this stage have traced the shape from my other stock but not sure I want to go down that path for shaping it as I am looking to keep as many of the layers of alloy continuous through the full length of the stock as possible. Will see what can be done once I get the bottom surfaces cut to shape
Re: DIY - New Build Project
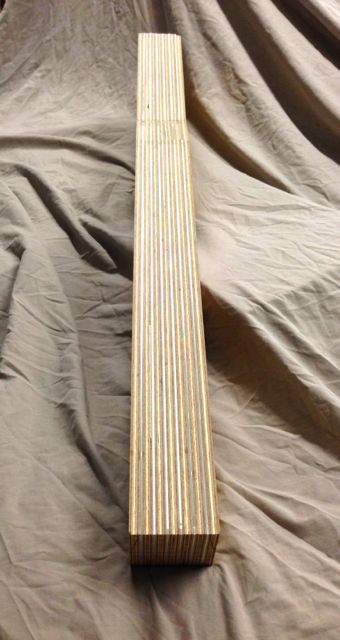
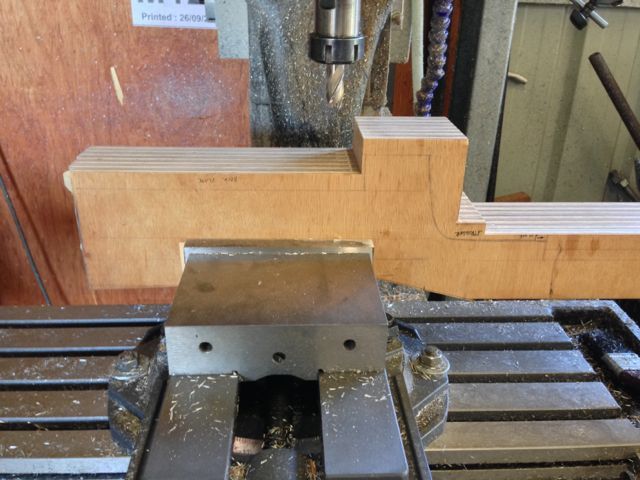
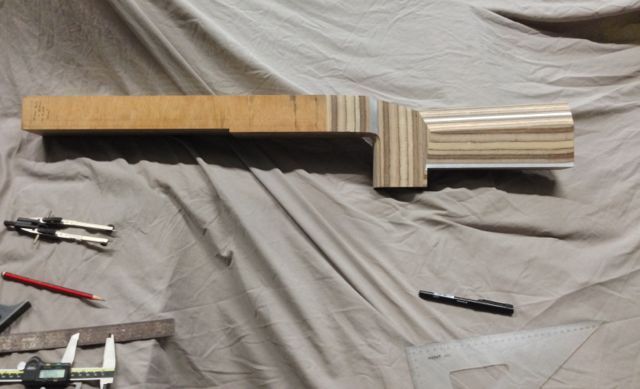
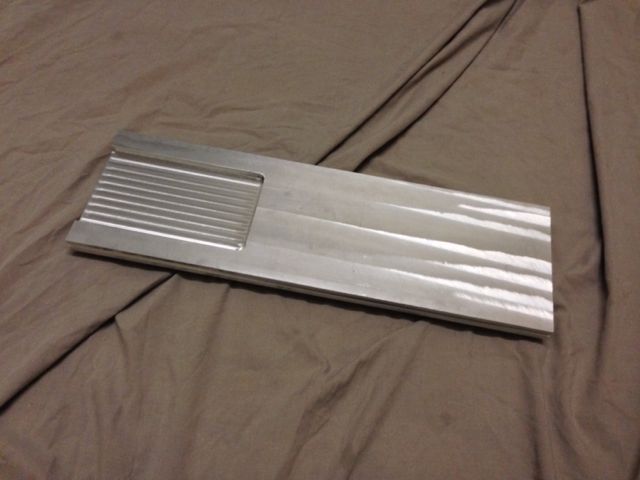
A few more photos of progress made for a bit today. Bottom surfaces are cut and parallel with bore line and each other.
Spent a while trying to work out the arrangement around the grip area of the stock to work out the best arrangement and think I have come up with something that I can get to work on tomorrow.
Spent a while trying to work out the arrangement around the grip area of the stock to work out the best arrangement and think I have come up with something that I can get to work on tomorrow.
-
curan

- .338 Lapua Magnum
- Posts: 2405
- Joined: Sat Aug 18, 2007 1:53 am
- Favourite Cartridge: 30/30
- Location: Mid North, South Australia
Re: DIY - New Build Project
You do pretty work Al.
Re: DIY - New Build Project
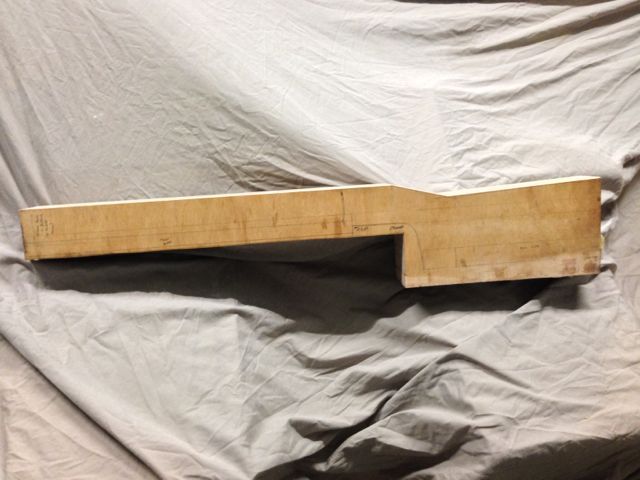
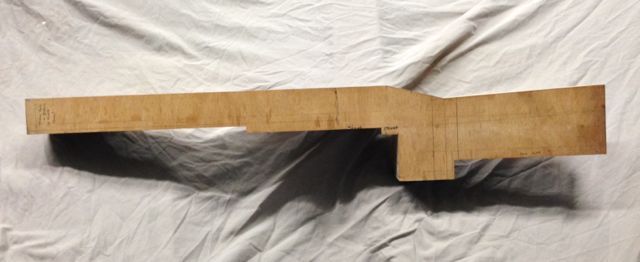
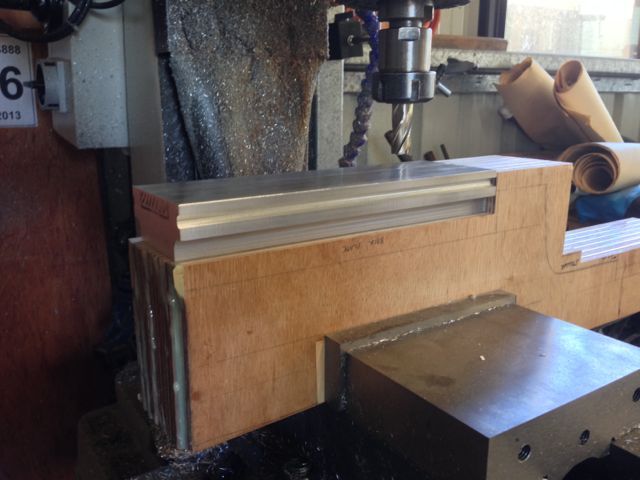
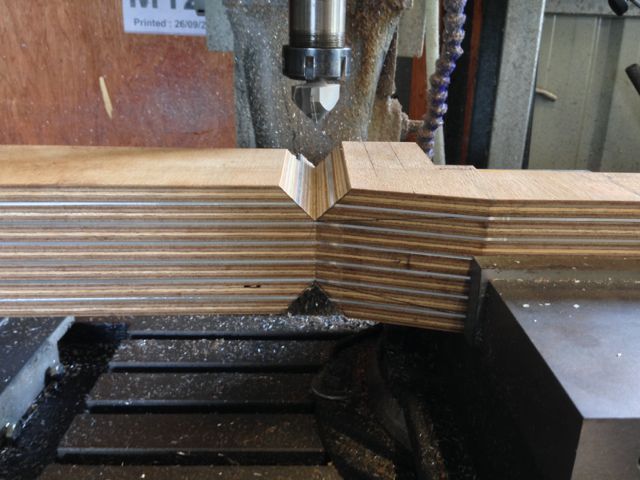
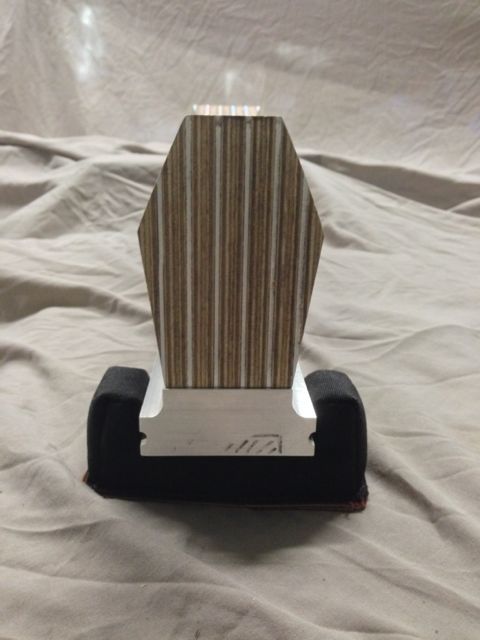
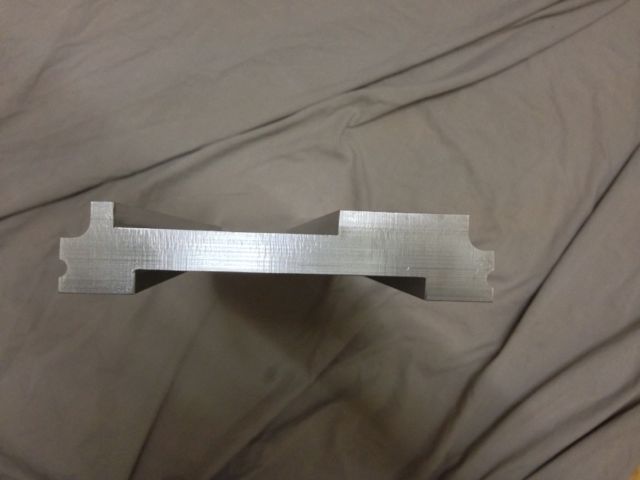
Ok so the last of the shaping was done today on the stock for the butt area and pistol grip area. The only things left to do are cut the barrel channel, make up the inserts for the front and rear pods, finish off the front and rear pods and inlet the stock for the barrelled action.
These are a few photos of the steps involved in the shaping done today.


These are a few photos of the steps involved in the shaping done today.

-
jacksaligari
- .223 Remington
- Posts: 448
- Joined: Sun Nov 22, 2009 8:24 pm
- Favourite Cartridge: 6br
- Location: Central victoria
Re: DIY - New Build Project
Looks good al
-
B4408
- .270 Winchester
- Posts: 1270
- Joined: Sat Aug 31, 2013 6:49 am
- Favourite Cartridge: 20VT
- Location: Mid North Coast, NSW
Re: DIY - New Build Project
The "grain" of the lamiates really plays tricks with the brain. Are you a machinist by trade or self taught?
Looks good, nice holiday project.
Bruce
Looks good, nice holiday project.
Bruce
Re: DIY - New Build Project
G'day Bruce
I'm self taught however am a tradie and at the start of my apprenticeship the company that I worked for had us go to their own training school. For the first 8 weeks of your apprenticeship you got to go there and do all the great things like make your toolbox (which I still have ) and during that time got to play on a lathe etc. so got a few basic skills. Other than that just spent time making my own gear like front rests, stocks and aluminium molds for some of my fibreglass work.
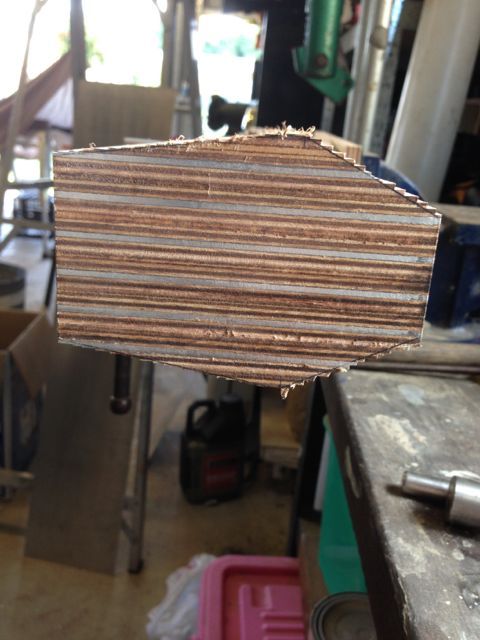
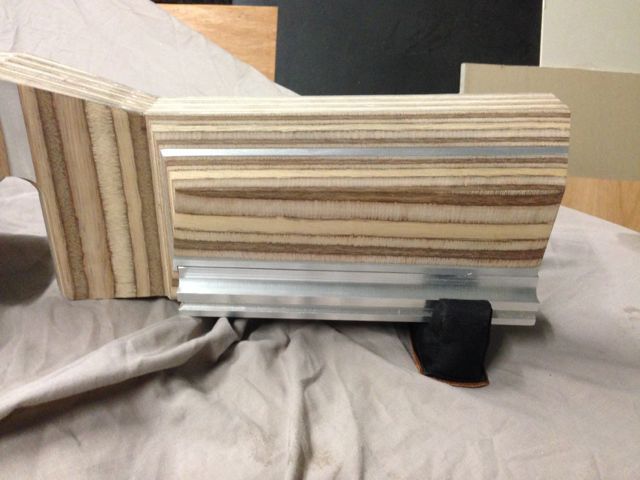
As far as the grain playing tricks on the brain that will be the straight flat lines of the shape which run in different directions through the layers of ply. The vertical lines come from an angle on the vertical axis (pistol grip area) whereas the horizontal lines come from angles along the length of the stock (butt stock area) and some of the surfaces are not parallel with the centre lines of the stock they are tapered...... Very different to a normal laminate stock that has curves as you get a blend from surface to surface with a curved line joining the different angles. Will be interesting to see what it looks like when I do the last couple of tapers (which I decided on last night  ) on the side of fore-end. That should give horizontal lines back along the fore-end although it will probably have a square joint line to the vertical lines at the pistol grip area of the stock
I'm self taught however am a tradie and at the start of my apprenticeship the company that I worked for had us go to their own training school. For the first 8 weeks of your apprenticeship you got to go there and do all the great things like make your toolbox (which I still have
As far as the grain playing tricks on the brain that will be the straight flat lines of the shape which run in different directions through the layers of ply. The vertical lines come from an angle on the vertical axis (pistol grip area) whereas the horizontal lines come from angles along the length of the stock (butt stock area) and some of the surfaces are not parallel with the centre lines of the stock they are tapered......
Re: DIY - New Build Project
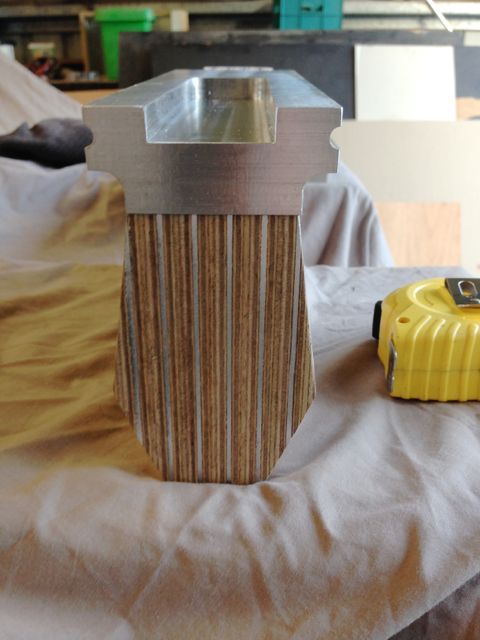
Ok so for today's instalment I did a bit of work on the alloy pods to cut rails and fit the front one to the stock given the step in the stock design. Next up will be making the inserts for the bolts to hold the pods on the stock and then fitting them to the stock and pods.
-
kickinback
- 50 BMG
- Posts: 3991
- Joined: Sun Jan 07, 2007 11:54 am
- Favourite Cartridge: 260 Rem
- Location: Lilydale Vic
Re: DIY - New Build Project
Good work mate. Keep the pics coming, I'm really enjoying this.
-
JasonF

- 7mm Rem Mag
- Posts: 1108
- Joined: Tue Feb 03, 2009 2:36 pm
- Favourite Cartridge: 7mm-08
- Location: Canberra region, NSW
Re: DIY - New Build Project
Me too! Thanks Albow.
Re: DIY - New Build Project
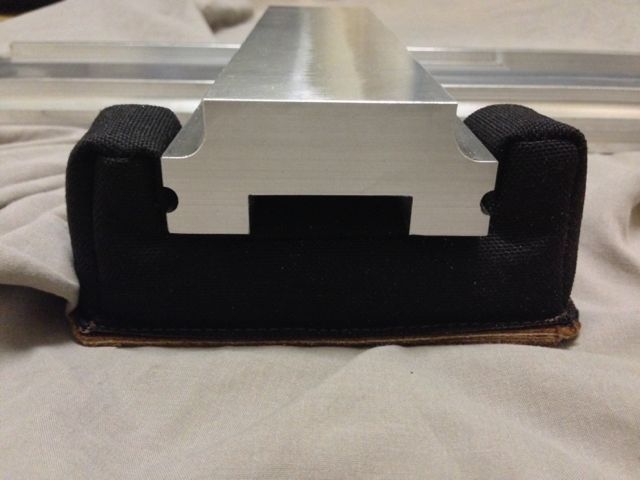
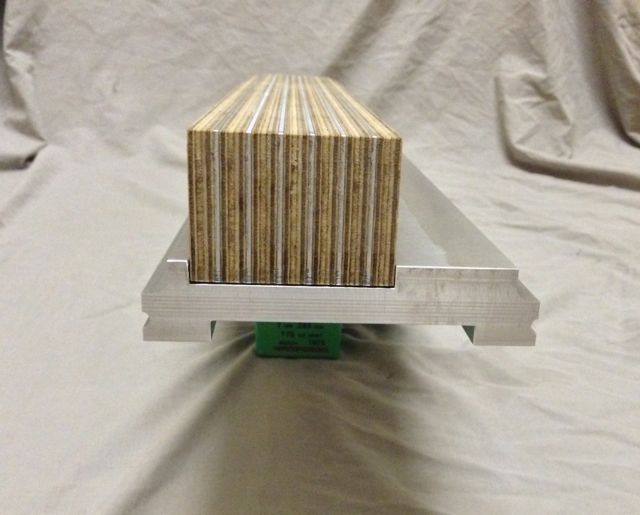
Ok, today's job was to knock out these little jiggers which will be set into the stock and glued in place then used to hold the front and back pods on. They were a little bit fiddly but not too bad. They have been design to use 6mm bolts to hold on the plates with small side deepest into the stock and wide side against the plates. The thin side is made to fit between two sheets of alloy and all told are 12mm deep 15mm round.
I took the first photo then it was not really possible to understand how big they were so I took a second one with a 6mm nut in the piccy. Once they are just about to be put in the stock it will all become clearer....... I hope
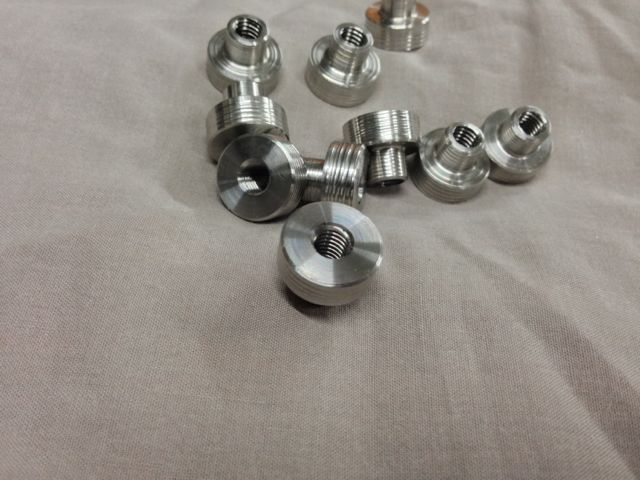
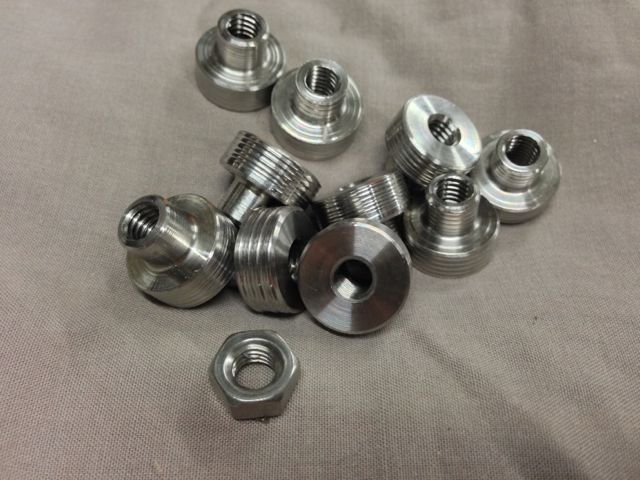
I took the first photo then it was not really possible to understand how big they were so I took a second one with a 6mm nut in the piccy. Once they are just about to be put in the stock it will all become clearer....... I hope
-
jacksaligari
- .223 Remington
- Posts: 448
- Joined: Sun Nov 22, 2009 8:24 pm
- Favourite Cartridge: 6br
- Location: Central victoria
Re: DIY - New Build Project
Nothing new done today al
Re: DIY - New Build Project
Nope, no new work on the stock today however spent a bit of time working out the rear rest and preparing materials for said build. Will be pretty basic to start with but trying to plan on being able to go adjustable in the future so trying to limit rework. Just another thing to build to get this new stock up and going.
Planning to try and have it shooting not this weekend but the following one. Will give me a chance to run it before the first weekend of February match to iron out any bugs. Got to be on my "A" game right from the first match if I want to catch mister Bending
Planning to try and have it shooting not this weekend but the following one. Will give me a chance to run it before the first weekend of February match to iron out any bugs. Got to be on my "A" game right from the first match if I want to catch mister Bending